nikon coolpix instruction manual

Nikon COOLPIX cameras offer user-friendly operation, with guides available for setup and use, ensuring a smooth experience for all photographers․

COOLPIX models often include a ‘Fast Track Guide’ for quick setting overviews, alongside comprehensive user manuals for detailed instructions․

What is the Nikon COOLPIX?

Nikon COOLPIX represents a long-standing series of digital cameras known for their compact size and ease of use․ These cameras cater to both beginners and enthusiasts, offering a balance between portability and image quality․

COOLPIX cameras, like the P1000, come with detailed instruction manuals, both printed and downloadable, to guide users through every feature․ They are designed for straightforward operation, making photography accessible to everyone․

COOLPIX Camera Series Overview

The Nikon COOLPIX series encompasses a wide range of models, from basic point-and-shoot cameras like the 2200/3200/4100 to more advanced options like the P1000․

Each COOLPIX model is accompanied by a specific user manual, often available for free download from the Nikon website or the Internet Archive․ These manuals detail the camera’s unique features and functionalities, ensuring optimal performance․

Getting Started with Your COOLPIX

Before use, thoroughly read your COOLPIX manual to understand its features․ Remember that a memory card isn’t always included with the camera․

Unboxing and Initial Setup

Upon opening your COOLPIX, carefully remove all packaging materials․ Familiarize yourself with the camera’s components as outlined in the included documentation․ Download necessary software, like ViewNX-i, from Nikon’s website to facilitate image transfer and organization․

Ensure you have a compatible memory card (SD, SDHC, or SDXC) ready for insertion, as these are often sold separately․ Initial setup involves language selection and date/time configuration․

Inserting the Battery and Memory Card

Locate the battery compartment, typically on the camera’s bottom, and insert the battery following the polarity markings․ Secure the battery door․ Next, find the memory card slot, often alongside the battery compartment․

Gently insert a compatible SD, SDHC, or SDXC card until it clicks into place․ Avoid forcing the card․ Ensure both the battery and card are firmly seated before powering on the camera․

Charging the Battery

Connect the provided AC adapter to the camera and a wall outlet․ A charging indicator light will illuminate, typically red or orange, signifying the charging process has begun․

Allow sufficient time for a full charge; the indicator light will usually change color (often to green) when complete․ Disconnect the adapter once fully charged to preserve battery life and avoid overcharging․

Understanding the Camera Controls

Familiarize yourself with the power button and mode dial for operation, alongside the shutter button and zoom control for capturing images effectively․

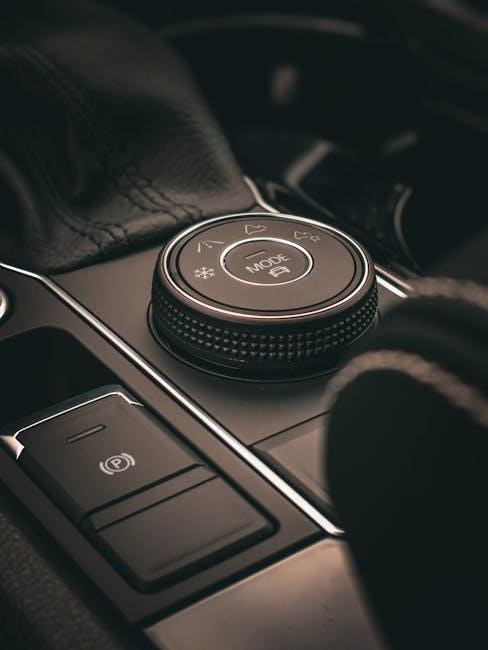
Power Button and Mode Dial

The power button initiates camera operation, while the mode dial selects shooting modes like Auto, Scene, or Movie․ Understanding these controls is crucial for navigating the camera’s functions․ Rotate the dial to choose the desired setting, ensuring it clicks into place․

Different modes optimize the camera for specific scenarios, simplifying the photographic process for beginners and offering creative control for experienced users․

Shutter Button and Zoom Control

The shutter button captures the image; pressing it halfway focuses, while a full press takes the picture․ Zoom control, typically a lever surrounding the shutter button, adjusts the lens for closer or wider views․

Smoothly operate the zoom to frame your subject effectively․ Practice coordinating focus and capture for sharp, well-composed photographs․ Trial shots are recommended before important events․

Menu Navigation and Settings

Access the menu using the camera’s buttons, navigating with directional pads or a touchscreen․ Settings control image quality, flash options, ISO, white balance, and more․ Explore these options to customize your shooting experience․

ViewNX-i software facilitates image transfer and settings adjustments on a computer․ Familiarize yourself with the menu structure for efficient camera control and optimal results․

Basic Shooting Modes

COOLPIX cameras feature Auto mode for simplicity, alongside Scene modes like Portrait, Landscape, and Sports, optimizing settings for various situations․

Auto Mode for Beginners

Auto mode simplifies photography by automatically selecting optimal settings for the current scene․ This is ideal for beginners, eliminating the need to adjust complex parameters like aperture or shutter speed․ The camera intelligently analyzes the lighting and subject, ensuring well-exposed and focused images․

Simply point and shoot – COOLPIX handles the technical details, allowing you to focus on composition and capturing the moment․ Taking trial shots before important events is recommended․

Scene Modes: Portrait, Landscape, Sports

Scene modes optimize camera settings for specific shooting situations․ Portrait mode softens backgrounds and enhances skin tones․ Landscape mode maximizes depth of field for sharp, detailed scenery․ Sports mode utilizes faster shutter speeds to freeze motion, capturing action clearly․

These pre-set options simplify achieving professional-looking results without manual adjustments, offering convenience and improved image quality for various subjects․

Night Mode and Low-Light Photography

Night mode extends shutter speed to capture more light in dark environments, ideal for cityscapes or dimly lit scenes․ Remember to use a tripod to prevent blur due to longer exposures․ Taking trial shots beforehand is recommended, especially for important events․

Experiment with settings to balance brightness and minimize noise for optimal low-light results․

Advanced Shooting Features

COOLPIX cameras allow adjustments to ISO settings, white balance, and focus modes, offering greater control over image quality and creative expression․

Understanding ISO Settings

ISO settings control your camera’s sensitivity to light․ Lower ISO values (like 100) are ideal for bright conditions, producing cleaner images with less noise; Higher ISO settings (like 800 or higher) are useful in low light, but can introduce more grain or noise into your photos․

Experiment with different ISO levels to find the best balance between brightness and image quality for various shooting scenarios․

White Balance Adjustment

White balance (WB) ensures colors appear natural, correcting for different lighting conditions․ COOLPIX cameras offer presets like ‘Daylight’, ‘Cloudy’, or ‘Fluorescent’․ Auto White Balance generally works well, but for specific situations, manual adjustment improves accuracy․

Incorrect WB can result in color casts – images appearing too blue or yellow․ Experiment to achieve realistic and pleasing colors in your photographs․

Focus Modes: Auto and Manual

COOLPIX cameras provide both Auto and Manual focus options․ Auto Focus is convenient for everyday shooting, quickly locking onto subjects․ Manual Focus allows precise control, useful for challenging situations where Auto Focus struggles, like low light or through obstructions․

Switching between modes is typically done via the camera’s menu․ Practice using both to understand their strengths and weaknesses․

Using the Flash

COOLPIX cameras offer Auto, Fill-Flash, and Red-Eye Reduction flash modes․ Adjusting flash intensity can fine-tune illumination for optimal image results․

Flash Modes: Auto, Fill-Flash, Red-Eye Reduction

Auto Flash lets the camera decide when flash is needed, ideal for varied lighting․ Fill-Flash provides extra light even in bright conditions, reducing shadows․

Red-Eye Reduction emits a pre-flash to minimize the red-eye effect in portraits․ Experiment with these modes to achieve the best results for different shooting scenarios, ensuring well-lit and natural-looking photos․

Adjusting Flash Intensity

Flash intensity control allows you to fine-tune the amount of light emitted by the flash․ Lowering the intensity softens the light, preventing harsh shadows and overexposure․

Increasing intensity boosts illumination in very dark environments․ Experiment with different settings to achieve the desired look, balancing brightness and natural tones for optimal image quality․

Reviewing and Deleting Photos

Playback mode enables photo review and zooming․ Easily delete unwanted images directly from the camera, freeing up memory card space for future captures․

Playback Mode and Zooming

To enter playback mode, press the playback button on your COOLPIX camera․ This allows you to view captured photos and videos on the LCD screen․ Zooming functionality is also available during playback, enabling closer inspection of image details․

Utilize the zoom control – typically the lever surrounding the shutter button – to magnify portions of the image․ This feature is invaluable for verifying focus and overall image quality, ensuring you capture the perfect shot․

Deleting Images from the Camera

To delete images, first enter playback mode․ Select the image you wish to remove, then access the camera’s menu․ Locate the delete option – often represented by a trash can icon – and confirm your selection․

Be cautious when deleting, as this action is usually irreversible․ Some cameras offer options for deleting single images or multiple images simultaneously, streamlining the process for managing your photos․

Connecting to a Computer

Transfer photos via USB cable, or utilize Nikon’s ViewNX-i software for image management and transfer capabilities․ Download the software from Nikon’s official website․

Transferring Photos via USB

Connect your COOLPIX to a computer using a USB cable․ The camera may appear as a removable drive, allowing direct file copying․ Alternatively, select ‘MTP’ or ‘PTP’ mode on the camera for image transfer options․

Ensure proper drivers are installed for optimal connectivity․ This method provides a straightforward way to move your photos from the camera to your computer for editing and storage․

Using Nikon Software (ViewNX-i)

ViewNX-i software, downloadable from Nikon’s website, facilitates image transfer, viewing, and basic editing․ It supports various file formats and offers organizational tools for managing your photos efficiently․

This software allows for quick image adjustments and provides a user-friendly interface for browsing and enhancing your COOLPIX camera’s captured memories․

Troubleshooting Common Issues

Common problems include the camera failing to power on, memory card errors, or subpar image quality; authorized service centers can provide assistance․

Camera Not Turning On

If your COOLPIX fails to power on, first ensure the battery is correctly inserted and fully charged․ Try a different battery if available․ Verify the power button is fully pressed․

Also, check for any obstructions around the battery compartment or power switch․ If the issue persists, consult the user manual or contact Nikon support for further troubleshooting steps and potential service options․

Memory Card Errors

When encountering memory card errors, ensure the card is compatible (SD, SDHC, SDXC) and properly inserted․ Try reformatting the card within the camera’s menu, but remember this will erase all data․

If the error continues, test with a different memory card․ A corrupted card may require replacement, and the manual advises using authorized service centers for assistance․

Image Quality Problems

If images appear blurry or of poor quality, verify the lens is clean and the focus mode is appropriate for the scene․ Adjust ISO settings for better low-light performance, and check white balance for accurate colors․

Before important events, take trial shots to assess settings․ Consider a camera service checkup by an authorized dealer if issues persist, as recommended in the manual․

Camera Maintenance and Care

Regularly clean the lens and camera body to maintain optimal performance․ Proper storage protects your COOLPIX from damage, ensuring longevity and image quality․

Cleaning the Lens and Body

To clean the lens, use a soft, dry cloth to gently wipe away dust and fingerprints․ For stubborn marks, a lens cleaning solution can be applied to the cloth, never directly onto the lens․

The camera body should be cleaned with a slightly damp, soft cloth․ Avoid using harsh chemicals or abrasive cleaners, as these can damage the finish․ Ensure the camera is turned off before cleaning․

Storing Your COOLPIX Camera

For long-term storage, remove the battery from your Nikon COOLPIX to prevent potential leakage or corrosion․ Store the camera in a cool, dry place, away from direct sunlight and extreme temperatures․

Consider using a camera bag or case to protect it from dust and physical damage․ Regularly check the camera after prolonged storage to ensure it remains in good condition․

Understanding Memory Cards

COOLPIX cameras support SD, SDHC, and SDXC memory cards for storing photos and videos; these are often not included with the camera purchase․

Compatible Memory Card Types (SD, SDHC, SDXC)

Nikon COOLPIX cameras are designed to work with several Secure Digital (SD) memory card formats․ These include standard SD cards, the higher-capacity SDHC (Secure Digital High Capacity) cards, and the even larger capacity SDXC (Secure Digital eXtended Capacity) cards․

The manual notes that within the documentation, all these card types are generally referred to simply as “memory cards․” Ensure compatibility for optimal performance․

Memory Card Capacity and Speed

COOLPIX cameras support a range of memory card capacities, from standard SD to high-capacity SDHC and SDXC cards․ While the manual doesn’t specify exact limits, larger capacities allow for more photos and videos․

Card speed is also crucial; faster cards ensure quicker image writing and smoother video recording․ Choosing the right speed class enhances the overall shooting experience․

Software and Updates

Nikon provides software like ViewNX-i for image transfer and management․ Regularly check for firmware updates to ensure optimal camera performance and new features․

Downloading and Installing Nikon Software

Nikon offers software such as ViewNX-i, downloadable from their official website, to facilitate image and movie transfer to your computer․ This software enhances workflow and provides editing capabilities․

Ensure your computer meets the system requirements before downloading․ Follow the on-screen instructions during installation, accepting license agreements and choosing your preferred installation directory․

Restart your computer after installation for optimal performance․

Firmware Updates for Your COOLPIX

Regularly check the Nikon website for firmware updates for your COOLPIX model․ These updates improve camera performance, add new features, and fix potential bugs․

Download the latest firmware and carefully follow the instructions provided by Nikon for installation․

Ensure your camera has sufficient battery charge during the update process to prevent interruption․

Nikon Support and Resources

Nikon provides extensive support through its official website, detailed manuals, and a network of authorized service centers for assistance․

Official Nikon Website and Manuals

Nikon’s official website is a central hub for COOLPIX resources, offering downloadable manuals and software like ViewNX-i for image transfer․

These manuals guide users through every aspect of their camera, from initial setup to advanced features, ensuring optimal performance․

Accessing these resources provides comprehensive support and troubleshooting assistance directly from the manufacturer․

Finding Authorized Service Centers

Nikon recommends professional servicing for your COOLPIX camera at least every two years to maintain peak performance and longevity․

Locating an authorized service center ensures qualified technicians handle repairs and maintenance, using genuine Nikon parts․

Nikon’s website provides tools to find nearby authorized centers for convenient and reliable support․

Tips for Better Photos

Always take trial shots before important events like weddings or graduations to ensure proper settings and avoid missed moments․

Composition Techniques

Mastering composition elevates your COOLPIX photography․ Consider the rule of thirds, placing key elements off-center for visual interest․ Utilize leading lines to draw the viewer’s eye into the scene․

Pay attention to backgrounds, ensuring they don’t distract from your subject․ Experiment with different angles and perspectives to create unique and compelling images․

Understanding Exposure

Exposure is crucial for well-lit photos․ It’s a balance of aperture, shutter speed, and ISO․ The COOLPIX’s Auto mode handles this, but learning manual control unlocks creativity․

Adjusting ISO affects sensitivity to light; higher ISO for low light, but can introduce noise․ Shutter speed controls motion blur; faster for freezing action․ Aperture impacts depth of field․

Safety Precautions

Handle the battery with care, avoiding extreme temperatures and impacts․ Protect the camera from water, dust, and physical shock for safe operation․

Handling the Battery Safely

Always use the designated Nikon battery charger for your COOLPIX camera․ Avoid exposing the battery to extreme heat or direct sunlight for prolonged periods․ Do not disassemble or modify the battery pack in any way, as this could cause damage or injury․

Ensure proper polarity when inserting the battery․ If the battery leaks, avoid contact with skin and eyes; rinse immediately with water and seek medical attention․

Protecting the Camera from Damage

To prevent damage, avoid dropping or subjecting your Nikon COOLPIX to strong impacts․ Shield the camera from water and excessive humidity; while some models offer weather sealing, caution is advised․ Keep the lens clean and protected with a lens cap when not in use․

Store the camera in a cool, dry place, away from dust and direct sunlight․ Regularly service the camera by an authorized dealer to maintain optimal performance․

pacific catch restaurant nutrition information pdf california

Pacific Catch Restaurant Nutrition Information: A Comprehensive Guide (California)

Pacific Catch provides detailed nutrition PDFs for California locations, enabling informed dining choices; access comprehensive data on calories, macros, and allergens online today!

Pacific Catch, a celebrated California restaurant chain, distinguishes itself through a strong commitment to nutritional transparency, empowering diners to make well-informed choices. Recognizing the growing demand for detailed dietary information, Pacific Catch proactively provides comprehensive nutrition facts for its diverse menu offerings. This dedication extends to making readily available nutrition information in PDF format, specifically tailored for California locations.

Understanding that individual dietary needs and preferences vary greatly, Pacific Catch aims to cater to a broad spectrum of customers. Whether you’re tracking calories, monitoring macronutrient intake, managing allergies, or adhering to specific dietary restrictions – such as gluten-free or vegan lifestyles – Pacific Catch equips you with the necessary tools. Accessing these nutrition PDFs allows for convenient pre-meal planning and mindful eating, fostering a positive and healthy dining experience. Their commitment showcases a respect for customer well-being and a dedication to responsible restaurant practices.

Understanding Pacific Catch’s Menu & Dietary Needs

Pacific Catch’s menu boasts a vibrant array of seafood-centric dishes, alongside flavorful sides and shareable plates, catering to diverse palates. However, navigating this culinary landscape requires understanding the nutritional implications of each choice. Fortunately, Pacific Catch addresses this need by providing accessible nutrition information, including downloadable PDFs for California diners. These resources are invaluable for individuals with specific dietary requirements.

Whether you’re seeking vegetarian, vegan, gluten-free, or dairy-free options, the nutrition PDFs clearly identify suitable menu items and potential allergens – shellfish, fish, soy, and more. Beyond simple identification, the PDFs detail calorie counts, macronutrient breakdowns (protein, fats, carbohydrates), and ingredient lists. This empowers customers to align their dining experience with personal health goals and dietary restrictions. Utilizing these resources ensures a satisfying and worry-free meal at Pacific Catch, promoting both enjoyment and well-being.

Key Nutritional Components Across the Menu

Pacific Catch’s California nutrition PDFs reveal vital data: calories, macronutrient ratios, and allergen details, empowering informed choices for healthier dining experiences.

Calorie Counts & Serving Sizes: A Detailed Overview

Pacific Catch’s California nutrition information, readily available in their downloadable PDFs and online resources, provides a granular look at calorie content across their diverse menu. Understanding serving sizes is crucial; for instance, the Pure Catch Pacific Cod Fillets (9oz) contain approximately 70 calories, while a single serving of Herb Crusted, Lemon Dijon Pacific Salmon registers at 290 calories.

These PDFs meticulously detail caloric variations based on preparation methods and portion sizes. Gym Gee’s analysis highlights the importance of “caloric cartography” for conscious dining. The restaurant’s commitment to transparency allows diners to accurately assess their intake, factoring in side dishes and customizations. Accessing these details empowers individuals to align their meal choices with their dietary goals, whether focused on weight management or simply mindful eating. The PDFs are a valuable tool for navigating Pacific Catch’s offerings.

Macronutrient Breakdown: Protein, Fats & Carbohydrates

Pacific Catch’s California nutrition PDFs comprehensively break down macronutrient profiles for each menu item. The Pure Catch Pacific Cod Fillets (9oz) exemplify this, boasting 15g of protein, 1g of fat, and 0g of carbohydrates. Conversely, the Herb Crusted, Lemon Dijon Pacific Salmon (per piece) delivers 28g of protein, 12g of fat, and 17g of carbohydrates.

These detailed breakdowns, accessible through online resources, are vital for individuals tracking their macronutrient intake for specific dietary needs – keto, paleo, or balanced diets. The PDFs allow for informed choices, enabling diners to prioritize protein, manage fat consumption, or limit carbohydrate intake. Pacific Catch prioritizes transparency, empowering customers to understand the composition of their meals beyond just calorie counts. This detailed information supports healthier and more personalized dining experiences throughout California.

Specific Menu Item Analysis: Westcoast Grilled Salmon

A deep dive into Pacific Catch’s California menu reveals the Westcoast Grilled Salmon as a nutritional standout, detailed within their accessible nutrition PDFs. While specific ingredient lists vary, the core offering provides a substantial protein source. Analyzing the data, customers can pinpoint precise macronutrient values to align with their dietary goals.

The nutrition information readily available online and in PDF format allows for informed decisions. Understanding the salmon’s composition – protein, fats, and carbohydrates – is crucial for mindful eating. Pacific Catch emphasizes transparency, enabling diners to assess the meal’s impact on their overall diet. This detailed analysis, coupled with allergen information, empowers customers throughout California to enjoy a delicious and health-conscious dining experience.

Ingredients & Calorie Information for Westcoast Grilled Salmon

Pacific Catch’s Westcoast Grilled Salmon, as detailed in their California nutrition PDFs, features responsibly sourced salmon, grilled to perfection. Key ingredients typically include the salmon fillet itself, a flavorful herb marinade, and a touch of lemon. While precise recipes are proprietary, the nutrition information provides a clear caloric breakdown.

According to available data, a single serving of Westcoast Grilled Salmon contains approximately 290 calories. This value, readily accessible in the downloadable PDFs, is crucial for those monitoring their intake. The nutrition facts also outline the fat content (around 12g), carbohydrate levels (approximately 17g), and a significant protein boost (around 28g). Pacific Catch prioritizes transparency, allowing California diners to make informed choices based on complete ingredient and caloric details.

Nutritional Values: Fat, Carbs & Protein in Westcoast Grilled Salmon

Analyzing the Pacific Catch Westcoast Grilled Salmon’s nutrition, as outlined in their California nutrition PDFs, reveals a balanced macronutrient profile. A standard serving delivers approximately 12 grams of fat, contributing to satiety and essential fatty acid intake. Carbohydrate content is around 17 grams, primarily from the marinade and any accompanying sauces.

However, the standout feature is the substantial protein content – roughly 28 grams per serving. This makes the Westcoast Grilled Salmon an excellent choice for muscle maintenance and overall health. These values, clearly presented in the downloadable PDFs, are vital for individuals tracking their macronutrient ratios. Pacific Catch’s commitment to nutrition transparency in California empowers diners to align their food choices with their dietary goals, offering a healthy and flavorful option.

Seafood Specifics: Nutritional Benefits & Considerations

Pacific Catch’s California seafood, detailed in their nutrition PDFs, offers omega-3s and lean protein; consider potential allergens when reviewing information.

Pacific Cod Fillets (Pure Catch): Nutritional Profile

Pacific Catch’s “Pure Catch” Pacific Cod Fillets present a lean protein source, detailed within their California nutrition information PDFs. A 9-ounce serving contains approximately 70 calories, 1 gram of fat, 0 grams of carbohydrates, and a substantial 15 grams of protein. This makes it an excellent choice for health-conscious diners.

The readily available PDFs outline the cod’s minimal fat content, contributing to a heart-healthy meal option. While low in carbohydrates, the focus remains on high-quality protein, essential for muscle maintenance and overall well-being. Reviewing the complete nutrition facts, accessible through Pacific Catch’s online resources, allows for informed dietary decisions.

Individuals seeking detailed macronutrient breakdowns or allergen information will find comprehensive data within these documents. The “Pure Catch” designation emphasizes a commitment to sourcing and transparency, further enhancing the value of the provided nutritional details for California customers.

Pacific Salmon (Herb Crusted, Lemon Dijon): Nutritional Profile

Pacific Catch’s Herb Crusted, Lemon Dijon Pacific Salmon offers a flavorful and nutrient-rich option, with detailed nutritional information available in their California PDFs. A single piece (serving size) contains approximately 290 calories, 12 grams of fat, 17 grams of carbohydrates, and a significant 28 grams of protein.

The nutrition facts highlight the salmon’s healthy fat content, crucial for heart health and brain function. The carbohydrate count stems from the herb crusting and lemon dijon sauce, adding to the dish’s complex flavor profile. This salmon provides a substantial protein boost, supporting muscle recovery and satiety.

Pacific Catch’s online resources and downloadable PDFs provide a complete breakdown of macronutrients and potential allergens. Reviewing these details empowers diners to make informed choices aligned with their dietary needs and preferences within California. The detailed nutritional profile underscores Pacific Catch’s commitment to transparency.

Understanding Omega-3 Fatty Acids in Pacific Catch Seafood

Pacific Catch emphasizes the health benefits of Omega-3 fatty acids, prominently featured in their California seafood selections, with detailed nutritional information readily available in their PDFs. These essential fats, abundant in Pacific Salmon and Cod, contribute to cardiovascular health, brain function, and reduced inflammation.

The nutritional profiles, accessible online and in downloadable PDFs, clearly outline the Omega-3 content per serving. Pacific Catch prioritizes sourcing seafood rich in these vital nutrients, offering diners a delicious and health-conscious experience. Understanding the Omega-3 benefits empowers informed choices.

California diners can easily access this information to align their meals with wellness goals. Pacific Catch’s commitment to transparency extends to highlighting the positive impact of Omega-3s. Reviewing the nutritional data allows customers to appreciate the health advantages of choosing seafood options at Pacific Catch.

Allergen Information & Dietary Restrictions

Pacific Catch’s California nutrition PDFs detail allergen information—shellfish, fish, soy, and more—supporting guests with dietary needs and restrictions effectively.

Pacific Catch Allergen Menu: Vegetarian, Vegan & More

Pacific Catch in California thoughtfully caters to diverse dietary preferences, clearly outlining options for vegetarian and vegan diners within their comprehensive nutrition PDFs. These resources detail menu items suitable for plant-based lifestyles, alongside indicators for dishes containing milk/dairy, wheat, shellfish, fish, or sesame.

The allergen menu, accessible through official Pacific Catch documentation, empowers guests to make informed choices, avoiding potential triggers. Share plates like Sea Bass Skewers and Hawaiian Pork Belly Sliders are specifically noted, allowing for careful consideration. This commitment to transparency extends beyond basic allergens, providing a detailed overview for individuals with specific sensitivities.

By consulting the nutrition information, customers can confidently navigate the menu, ensuring a safe and enjoyable dining experience aligned with their dietary requirements. Pacific Catch prioritizes inclusivity and provides the tools necessary for mindful eating.

Identifying Common Allergens: Shellfish, Fish, Soy, etc.

Pacific Catch’s California nutrition PDFs meticulously detail potential allergens present in their menu items, going beyond the “Big 9” to ensure comprehensive transparency. Shellfish and various types of fish are prominently flagged, given the restaurant’s seafood focus, allowing diners with sensitivities to easily identify risky options.

Furthermore, the documentation clearly indicates the presence of soy, wheat, dairy, eggs, and sesame – common allergens impacting a significant portion of the population. This detailed breakdown extends to ingredients within sauces and marinades, providing a holistic view of potential exposure.

Guests can confidently review these resources to proactively manage their allergies, avoiding unwanted reactions. Pacific Catch demonstrates a strong commitment to food safety and empowers customers with the information needed for a worry-free dining experience, readily available in their downloadable PDFs.

Navigating Dietary Needs: Gluten-Free & Dairy-Free Options

Pacific Catch’s California nutrition PDFs are invaluable for diners following gluten-free or dairy-free diets. While seafood is naturally gluten and dairy-free, the PDFs highlight potential cross-contamination risks and ingredients in marinades, sauces, and accompanying sides. Several menu items can be easily modified to accommodate these needs, and the documentation clearly indicates suitable choices.

The restaurant provides detailed ingredient lists, enabling informed decisions about potential hidden sources of gluten or dairy. For those with severe allergies, the PDFs also offer guidance on communicating dietary restrictions to staff.

Pacific Catch actively supports inclusive dining, offering flavorful options for various dietary preferences. By consulting the readily available PDFs, customers can confidently enjoy a delicious meal tailored to their specific requirements, ensuring a safe and satisfying experience.

Accessing Pacific Catch Nutrition Information (PDF & Online)

Pacific Catch offers California nutrition details via downloadable PDFs and online resources, empowering diners with comprehensive data for informed, healthy choices today!

Locating Official Nutrition PDFs for Pacific Catch (California)

Pacific Catch prioritizes transparency, making comprehensive nutritional information readily available to its California customers. Finding these official PDFs is a straightforward process designed to empower informed dining decisions. Typically, the most reliable source is the official Pacific Catch website. Navigate to the “Nutrition” or “Menu” section – often found in the website’s footer – and look for a dedicated link to download the complete nutritional guide as a PDF document.

These PDFs contain detailed breakdowns of each menu item, including calorie counts, macronutrient profiles (protein, fats, carbohydrates), and allergen information. It’s crucial to ensure you’re accessing the most up-to-date version, as menus and recipes can occasionally change. Direct links to these PDFs may also be available through third-party restaurant information websites, but always verify the source to guarantee accuracy. Pacific Catch’s commitment to providing this information reflects a dedication to customer well-being and dietary awareness.

Utilizing Online Nutrition Calculators & Resources

While Pacific Catch provides detailed PDFs, several online nutrition calculators and resources can supplement your dietary planning. Websites like MyFitnessPal or FatSecret allow users to input menu items – or create custom entries based on the PDF information – to track calorie and macronutrient intake. These tools are particularly useful for individuals following specific diets or managing health conditions.

RecipeOfHealth.com offers specific nutritional breakdowns for Pacific Catch items, such as 70 kcals for 9oz of Portlock Pure Catch Pacific Cod Fillets and 290 kcals for Herb Crusted Salmon. Remember to cross-reference information from these sources with the official Pacific Catch PDF to ensure accuracy. Consider using these calculators to build balanced meals, adjust portion sizes, and understand the overall nutritional impact of your dining choices. Combining official data with online tools empowers a proactive approach to healthy eating.

nymphomaniac parents guide

Understanding Female Sexual Desire: A Parent’s Guide

Navigating discussions about sexuality requires sensitivity, acknowledging that sexual health encompasses physical, emotional, mental, and social well-being – not just disease absence․

What is Female Sexual Desire?

Female sexual desire is a complex interplay of biological, psychological, and social factors, varying significantly among individuals throughout their lives․ It’s crucial to understand that desire isn’t simply about frequency, but rather a subjective experience of wanting sexual activity․

Historically, terms like “nymphomania” were used to pathologize high sexual desire in women, reflecting societal biases and a lack of understanding․ These labels are now considered harmful and inaccurate․ Today, we recognize a spectrum of sexual interest, where what’s considered “normal” is incredibly diverse․

Comprehensive sexuality education (CSE) emphasizes accurate, age-appropriate information, vital for healthy development․ Sex, in a technical context, refers to biological attributes, while sexuality encompasses broader aspects of identity and experience․ Understanding this distinction is key to fostering open communication․

The Spectrum of Sexual Interest

Recognizing that sexual interest exists on a broad spectrum is fundamental to healthy conversations․ Desire fluctuates naturally due to hormonal changes, stress, relationship dynamics, and personal experiences․ There’s no “right” or “wrong” level of desire; what matters is that it’s consensual and doesn’t cause distress․

The outdated term “nymphomania,” used historically to shame women with higher libidos, has no place in modern understanding․ It’s vital to avoid pathologizing natural variations in sexual drive․ Instead, focus on fostering a positive and accepting attitude towards diverse expressions of sexuality․

Sexual health, as defined by the WHO, encompasses physical, emotional, mental, and social well-being․ This holistic view acknowledges that pleasure is an integral part of a healthy sexual life, and open communication is essential for navigating individual needs․

Defining Hypersexuality & Nymphomania (Historical Context)

Historically, the term “nymphomania” was a pejorative label applied to women exhibiting perceived excessive sexual desire, rooted in societal biases and a lack of understanding․ This diagnosis, absent from modern medical classifications, served to control and shame women, often leading to harmful treatments․ It’s crucial to understand this problematic past․

Today, “hypersexuality” (or Compulsive Sexual Behavior Disorder) is a more nuanced concept, focusing on distress and functional impairment caused by uncontrollable sexual urges․ It differs significantly from simply having a high libido․ The key is whether the behavior negatively impacts daily life․

Understanding this historical context is vital when discussing sexuality with teens․ It’s important to dismantle harmful stereotypes and emphasize that healthy sexual expression varies widely․ Focusing on consent, respect, and well-being is paramount, rejecting outdated and damaging labels․

Factors Influencing Female Sexual Desire

Numerous elements shape desire, including biological factors like hormones, psychological states such as stress, and broader social and cultural influences on sexuality․

Biological Factors: Hormones & Neurotransmitters

Hormonal fluctuations significantly impact female sexual desire, with estrogen, testosterone, and progesterone playing crucial roles throughout life stages․ Understanding these biological underpinnings is vital, though attributing desire solely to hormones is an oversimplification․ Neurotransmitters, like dopamine and serotonin, also heavily influence sexual motivation and response; imbalances can affect libido․

It’s important to remember that biological factors interact with psychological and social elements․ While hormonal therapies might be considered in some cases, a comprehensive approach addressing all contributing factors is generally more effective․ Open communication with healthcare professionals is key to understanding individual hormonal profiles and potential interventions․ Dismissing concerns as “just hormones” can be invalidating and prevent seeking appropriate support․

Psychological Factors: Stress, Trauma & Mental Health

Psychological well-being profoundly influences sexual desire․ Chronic stress, anxiety, and depression can significantly diminish libido, while unresolved trauma – including sexual abuse – often creates complex challenges related to sexuality․ Mental health conditions frequently co-occur with altered sexual functioning, requiring integrated treatment approaches․

It’s crucial to create a safe space for open communication, acknowledging that past experiences can deeply impact present-day sexual health․ Dismissing emotional distress or minimizing trauma can be harmful․ Seeking professional guidance from therapists specializing in sexual health and trauma is essential for healing and developing healthy coping mechanisms․ Remember, addressing underlying psychological factors is often a vital step towards restoring sexual well-being․

Social & Cultural Influences on Sexuality

Societal norms and cultural beliefs powerfully shape perceptions of sexuality․ Stigmas surrounding female sexuality, often rooted in patriarchal structures, can lead to shame, guilt, and repression․ These influences impact how individuals understand and express their desires, potentially contributing to distorted views of healthy sexual functioning․

Comprehensive sexuality education (CSE) is vital for challenging harmful stereotypes and promoting positive attitudes towards sexuality․ Openly discussing societal pressures and cultural expectations can empower teens to develop their own values and make informed decisions․ Recognizing that sexuality is a natural and healthy aspect of being human, free from judgment, is paramount․ Addressing these influences fosters a more inclusive and accepting environment for exploring sexual well-being․

Communicating with Your Teen About Sexual Health

Cultivate open dialogue, offering age-appropriate information about sexuality and reproductive health, crucial for their well-being and informed decision-making processes․

Age-Appropriate Conversations About Sexuality

Initiating conversations about sexuality can feel daunting, but approaching the topic with openness and honesty is paramount․ Begin with basic body awareness and healthy relationships during pre-adolescence, focusing on respect and boundaries․ As your teen matures, expand discussions to include puberty, attraction, and responsible decision-making․

Avoid lecturing; instead, foster a safe space for questions and concerns․ Acknowledge that sexuality is a natural part of life and address misinformation with accurate, age-appropriate information․ Comprehensive sexuality education (CSE) provides a framework for these discussions, covering topics beyond just abstinence, including consent, healthy relationships, and sexually transmitted infections (STIs)․

Remember to tailor the conversation to your teen’s maturity level and understanding․ Be prepared to answer difficult questions honestly and without judgment, and emphasize the importance of seeking help from trusted adults if they ever feel uncomfortable or unsafe․

Comprehensive Sexuality Education (CSE) – What it Entails

Comprehensive Sexuality Education (CSE) extends far beyond simply discussing abstinence․ It’s a holistic approach providing young people with accurate, age-appropriate information about sexuality and reproductive health, crucial for their overall well-being․ CSE encompasses a wide range of topics, including puberty, body image, consent, healthy relationships, contraception, and sexually transmitted infections (STIs)․

Effective CSE promotes critical thinking and decision-making skills, empowering adolescents to make informed choices about their sexual health․ It emphasizes respect for oneself and others, challenging harmful gender stereotypes and promoting equality․ Importantly, CSE acknowledges that sex is more than just biological function; it’s intertwined with emotional, mental, and social aspects․

A quality CSE program equips young people with the knowledge and skills to navigate relationships safely and responsibly, contributing to healthier communities and reduced rates of unintended pregnancies and STIs․

The Importance of Open Communication

Establishing open and honest communication with your teen about sexual health is paramount․ Creating a safe space where they feel comfortable asking questions, expressing concerns, and sharing experiences without judgment is essential․ This means actively listening, validating their feelings, and avoiding dismissive or shaming responses․

Open dialogue fosters trust and encourages your teen to seek guidance from you rather than relying on potentially inaccurate or harmful information from peers or the internet․ It allows you to address misconceptions, provide accurate information, and reinforce healthy attitudes towards sexuality․ Remember, silence can be more damaging than open conversation․

Regular check-ins, even brief ones, demonstrate your ongoing support and willingness to discuss sensitive topics․ This proactive approach builds a strong foundation for a healthy parent-teen relationship and promotes responsible decision-making․

Safe Sex Practices & Adolescent Sexual Health

Prioritizing safe practices minimizes body fluid exchange, protecting against STI transmission during oral, vaginal, and anal sexual activity, crucial for adolescent well-being․

Understanding Body Fluids & STI Transmission

Openly discussing body fluids is essential for adolescent sexual health education․ These include saliva, urine, blood, vaginal fluids, and semen – all potential vectors for Sexually Transmitted Infections (STIs)․ It’s vital to explain that STIs can be spread through oral, vaginal, and anal sexual contact, emphasizing that even seemingly ‘safe’ practices carry risk if precautions aren’t taken․

Explain that STI transmission isn’t always symptomatic; many infections present no immediate signs, making regular testing crucial․ Discuss the importance of understanding how STIs impact the body and the long-term health consequences of untreated infections․ Accurate information empowers teens to make informed decisions and prioritize their well-being, fostering a culture of responsibility and proactive health management․

Safe Sex Methods for Adolescents

Discussing safe sex methods requires a non-judgmental approach, emphasizing that these tools empower adolescents to protect their health․ Consistent and correct condom use is paramount, significantly reducing the risk of STI transmission and unintended pregnancy․ Explain proper condom application and storage, addressing common misconceptions․

Beyond condoms, explore other options like dental dams for oral sex, though emphasize their less common use․ Highlight the importance of open communication with partners about STI status and safe sex practices․ Reinforce that abstinence is the only 100% effective method, but when choosing to be sexually active, prioritizing safety is crucial․ Encourage teens to seek reliable information and consult healthcare professionals for personalized guidance․

Emergency Contraception (Plan B) – Information for Parents

Understanding emergency contraception (EC), often known as Plan B, is vital․ It’s a backup method, not a regular form of birth control, and works by delaying ovulation․ Explain that Plan B is most effective when taken as soon as possible after unprotected sex, ideally within 72 hours, though effectiveness decreases with time․

Emphasize that Plan B doesn’t terminate an existing pregnancy; it prevents one from occurring․ While it’s safe for most individuals, it’s crucial to understand it doesn’t protect against STIs, necessitating continued safe sex practices․ After taking Plan B, a backup method is recommended for the next menstrual cycle․ Encourage open dialogue and access to reliable information, assuring your teen that seeking EC isn’t a sign of irresponsibility, but proactive health management․

Sexual Well-being & Pleasure

Redesigning sexual education to incorporate pleasure considerations is vital, recognizing that sexual health is a positive and enjoyable aspect of life, not solely risk avoidance․

The WHO Definition of Sexual Health

The World Health Organization (WHO) defines sexual health as a state of complete physical, emotional, mental, and social well-being related to sexuality – it’s far more than simply the absence of disease or dysfunction․ This holistic view emphasizes that a fulfilling sexual life contributes significantly to overall health and quality of life․

Understanding this definition is crucial when discussing sexuality with teenagers․ It allows for conversations that move beyond just preventing STIs and unwanted pregnancies, encompassing positive experiences, consent, body image, and respectful relationships․ Sexual health isn’t just about risks; it’s about pleasure, intimacy, and self-discovery․

Furthermore, recognizing sexuality as a fundamental aspect of human experience helps dismantle societal stigmas and encourages open communication․ A healthy approach to sexual health acknowledges that it’s a natural and normal part of life, fostering a safe space for questions and concerns․

Incorporating Pleasure into Sexual Health Discussions

Traditionally, sexual health education has often focused primarily on risks – STIs, pregnancy, and coercion․ However, recent research, including studies from the WHO and The Pleasure Project, highlights the critical importance of incorporating discussions about sexual pleasure․ Ignoring pleasure perpetuates harmful stigmas and can lead to shame or discomfort around healthy sexual expression․

Talking about pleasure doesn’t mean detailing specific acts; it means acknowledging that positive sexual experiences are a normal and healthy part of life․ It’s about fostering body positivity, understanding consent as enthusiastic agreement, and recognizing that pleasure is subjective and varies for everyone․

Redesigning sexual education to include pleasure considerations can empower young people to have safer, more fulfilling, and more equitable sexual relationships․ It’s about creating a comprehensive understanding of sexual well-being․

Addressing Societal Stigmas Around Female Sexuality

Historically, societal norms have often imposed double standards regarding sexual expression, particularly for women․ Terms like “nymphomania” – now recognized as a harmful and inaccurate label – reflect a long history of pathologizing female desire․ These stigmas contribute to shame, silence, and a lack of open communication about sexual health․

It’s crucial to challenge these ingrained biases and create a safe space for discussing female sexuality without judgment․ Parents can model healthy attitudes by openly acknowledging that women experience sexual desire and pleasure, and that this is normal and natural․

Addressing these stigmas requires dismantling harmful stereotypes and promoting a more inclusive understanding of sexual well-being, recognizing that sexuality is a fundamental aspect of human experience․

Recognizing Potential Concerns & Seeking Help

If concerning behaviors emerge, professional guidance is vital; resources exist for both parents and teens navigating complex sexual health questions and anxieties․

When to Seek Professional Guidance

Determining when to seek professional help requires careful observation and open communication․ If a teen exhibits significant distress related to their sexuality, or if behaviors are causing harm to themselves or others, professional intervention is crucial․ Concerns arise when sexual activity becomes compulsive, interferes with daily life, or leads to risky situations․

Look for signs of emotional or psychological distress, such as anxiety, depression, or feelings of shame․ Changes in behavior, withdrawal from social activities, or academic decline can also indicate underlying issues․ Remember, comprehensive sexuality education (CSE) provides accurate information, but it doesn’t replace the need for personalized support when challenges arise․

A qualified therapist or counselor can offer a safe space for exploration and provide strategies for healthy coping mechanisms․ Don’t hesitate to reach out to healthcare professionals for guidance and support, prioritizing your teen’s well-being above all else․

Resources for Parents & Teens

Accessing reliable information and support is vital for navigating complex conversations about sexuality․ The World Health Organization (WHO) offers comprehensive resources on sexual health, defining it as encompassing physical, emotional, mental, and social well-being․ For parents seeking guidance on age-appropriate discussions, Planned Parenthood provides valuable educational materials and support services․

Teen-focused resources like Scarleteen offer inclusive and accurate information about sexual health, relationships, and consent․ Additionally, the Department of Education (DepEd) is working to ensure sex education in schools is culturally sensitive and responsive to student needs․

Remember, open communication is key․ Encourage your teen to ask questions and express their concerns without judgment․ Utilizing these resources can empower both parents and teens to foster a healthy understanding of sexuality and well-being․

indesit inverter motor washing machine manual

Indesit Inverter Motor Washing Machine Manual: A Comprehensive Guide

This manual provides detailed instructions for Indesit washers, covering installation, operation, maintenance, and service – including repair information.

Explore Atlanta’s attractions while ensuring optimal performance from your washing machine, referencing this guide for troubleshooting and advanced settings;

Understanding Your Indesit Inverter Motor Washer

Indesit’s inverter motor technology represents a significant advancement in washing machine design, offering enhanced efficiency, quieter operation, and increased durability compared to traditional motors. This manual focuses on models equipped with this innovative system. The inverter motor directly connects to the drum, eliminating the need for belts and pulleys, which reduces energy loss and mechanical wear.

Understanding this core component is crucial for maximizing your washing machine’s lifespan and performance. Atlanta’s bustling lifestyle demands reliable appliances, and your Indesit washer is designed to meet those needs. The motor’s precise control allows for a wider range of spin speeds and gentler wash cycles, protecting your garments. Familiarize yourself with the specific features of your model, as detailed in the following sections, to ensure optimal cleaning results and efficient operation. Proper care, as outlined in this guide, will contribute to years of dependable service.

Key Features of Indesit Inverter Technology

Indesit’s inverter technology delivers several key benefits. Firstly, it provides superior energy efficiency, reducing electricity consumption and lowering your utility bills – a welcome advantage in a city like Atlanta. Secondly, the inverter motor operates significantly quieter than conventional motors, minimizing noise disruption during wash cycles. This is particularly valuable for open-plan living spaces.

Furthermore, the direct drive system enhances the washing machine’s durability by eliminating belts and pulleys, reducing potential failure points. Precise motor control allows for optimized drum movements, resulting in gentler fabric care and improved washing performance. The Auto Clean function, alongside various wash programs, further enhances convenience. This technology ensures a longer lifespan for your appliance, offering reliable service and consistent cleaning results. Understanding these features will help you fully utilize your Indesit washer.

Safety Precautions Before Use

Prior to operating your Indesit washing machine, several safety precautions are essential. Always ensure the appliance is correctly grounded and connected to a compatible electrical supply. Never operate the machine with a damaged power cord or plug. Keep children and pets away from the washing machine during operation, and supervise their proximity.

Do not attempt to repair the appliance yourself; contact authorized service centers for assistance. Avoid overloading the drum, as this can cause damage and affect performance. Before cleaning or performing maintenance, always disconnect the machine from the power supply. Be mindful of hot water temperatures and avoid contact with draining water. Following these guidelines will ensure safe and reliable operation, even within a bustling environment like Atlanta, and prolong the lifespan of your appliance.

Installation and Setup

Proper installation is crucial for optimal performance; carefully unpack, position, and connect water/drainage, ensuring electrical requirements align with Atlanta’s standards.

Unpacking and Positioning the Washing Machine

Carefully unpack your new Indesit washing machine, removing all packaging materials – including transit bolts located on the rear panel – which are vital for safe operation. These bolts must be removed before use to prevent damage during the wash cycle. Inspect the appliance thoroughly for any signs of shipping damage.

Position the washing machine on a firm, level floor; uneven surfaces can cause excessive vibration and noise. Adjust the leveling feet to ensure stability. Allow sufficient space around the machine for ventilation and easy access for maintenance – at least 10cm on each side and behind.

Avoid direct sunlight and extreme temperatures. Consider Atlanta’s climate; ensure the machine is protected from potential moisture issues. Do not place the machine near flammable materials or sources of heat. Verify the floor can support the weight of the machine when fully loaded with water and laundry.

Connecting Water Supply and Drainage

Connect the water inlet hoses to the hot and cold water taps, ensuring a secure, leak-proof connection. Use new hoses supplied with the machine; do not reuse old ones. The blue hose connects to cold water, and the red to hot. Water pressure should be within the specified range (typically 0.1 ⏤ 1.0 MPa).

Attach the drain hose to a suitable standpipe or sink drain, ensuring it’s securely fixed and positioned to prevent siphoning. The end of the hose should be at a height between 60cm and 90cm above the floor.

In Atlanta, check local plumbing codes for compliance. Regularly inspect the hoses for cracks or leaks. If stacking a dryer, confirm compatibility with Indesit’s After-Sales Service before proceeding.

Electrical Connection Requirements

Ensure the washing machine is grounded correctly to prevent electric shock. The voltage and frequency must match the specifications on the appliance’s rating plate (typically 220-240V, 50Hz). Do not use extension cords or adapters. A dedicated, properly fused circuit is recommended.

The electrical connection should be carried out by a qualified electrician, adhering to local regulations – particularly important in a city like Atlanta with specific building codes. Verify the socket is earthed and in good working order before plugging in the machine.

Indesit recommends checking the power supply before any repair or service. Incorrect electrical connections can damage the inverter motor and void the warranty.

Operating Your Washing Machine

Master the control panel, load laundry efficiently, and select appropriate wash programs for optimal cleaning – mirroring Atlanta’s diverse needs.

Utilize the Indesit features for effective and convenient laundry care, as detailed in this comprehensive guide.

Control Panel Overview and Functions

The Indesit inverter motor washing machine’s control panel is designed for intuitive operation, offering a range of functions to customize your wash cycles. Familiarize yourself with the power button, program selector dial, and display screen, which provides cycle status and error codes.

Key functions include temperature adjustment, spin speed control, and options like delay start – allowing you to schedule washes around your lifestyle, much like planning activities in Atlanta. The display will illuminate selected settings.

Specific program buttons correspond to different fabric types and soil levels, ensuring optimal cleaning results. Explore the auto-clean function for maintaining machine hygiene. Refer to the manual for detailed explanations of each program and its recommended use. Understanding these controls unlocks the full potential of your Indesit washer.

Loading Laundry Correctly

Proper laundry loading is crucial for optimal washing performance and to prevent damage to both your clothes and the Indesit washing machine. Avoid overloading the drum; consult the manual for recommended load capacities based on fabric type. Distribute items evenly to maintain balance during the spin cycle – similar to ensuring a balanced itinerary when exploring Atlanta.

Separate delicate items and place them in a mesh laundry bag for protection. Check pockets for loose objects like coins or keys. Larger items, such as duvets, should be washed alone to allow for sufficient movement.

Do not force items into the drum. Overloading can strain the inverter motor and reduce cleaning effectiveness. Following these guidelines ensures efficient and gentle cleaning, extending the life of your garments and appliance.

Selecting Wash Programs

Your Indesit inverter motor washing machine offers a variety of wash programs tailored to different fabric types and soil levels, much like Atlanta offers diverse attractions. Refer to the program chart in this manual to select the most appropriate cycle. Options include Cotton, Synthetics, Delicates, Wool, and Quick Wash.

Consider the garment care labels before choosing a program. For heavily soiled items, pre-wash or select a higher wash temperature. Utilize the ‘Auto Clean’ function for automatic program selection based on load weight and dirtiness. Remember, efficient program selection maximizes cleaning performance and minimizes energy consumption.

Experiment with different settings to achieve optimal results. The manual details each program’s specific parameters, ensuring your laundry receives the best possible care.

Maintenance and Troubleshooting

Regular cleaning and addressing error codes are vital for longevity, similar to Atlanta’s city upkeep. Filter cleaning ensures peak performance.

Regular Cleaning Procedures

Maintaining your Indesit washing machine requires consistent attention to cleanliness, ensuring optimal performance and preventing potential issues. Begin by wiping down the exterior with a damp cloth and mild detergent after each use, similar to keeping Atlanta’s public spaces tidy.

The detergent dispenser drawer should be removed and cleaned monthly to prevent residue buildup, which can affect wash cycles. The rubber door seal is prone to mold and mildew; wipe it down after every wash and periodically treat with a mold and mildew cleaner.

Run a hot water cycle with a washing machine cleaner every one to two months to remove internal buildup and odors – akin to a deep clean for the machine. This helps maintain the efficiency of the Inverter motor and prolongs the appliance’s lifespan. Remember to consult the full service manual for detailed instructions.

Dealing with Common Error Codes

Indesit washing machines utilize error codes to signal malfunctions, aiding in diagnosis and repair. A flashing light or specific code displayed on the control panel indicates an issue, much like navigating Atlanta’s complex transportation system requires understanding signals.

Common codes include F01 (water intake issue), F03 (drainage problem), and F08 (unbalanced load). Before contacting service, attempt simple solutions: check the water supply, drainage hose for kinks, or redistribute the laundry.

Consult the comprehensive service manual for a complete list of error codes and corresponding troubleshooting steps. Resetting the machine by unplugging it for a few minutes can sometimes resolve minor glitches. If the error persists, note the code and contact Indesit customer support or an authorized repair center for professional assistance.

Filter Cleaning and Replacement

Regular filter cleaning is crucial for maintaining your Indesit washing machine’s performance, preventing blockages and ensuring efficient drainage – akin to maintaining Atlanta’s infrastructure for smooth operation. The filter traps lint, debris, and small objects, protecting the pump from damage.

Locate the filter access panel, typically at the front bottom of the machine. Have a towel ready to absorb any spilled water. Carefully unscrew the filter cover and remove the filter. Clean it thoroughly under running water, removing all accumulated debris.

Inspect the filter for damage; replace it if cracked or broken. Reinstall the cleaned or new filter, ensuring it’s securely tightened. Refer to the service manual for specific filter replacement instructions and part numbers. Consistent filter maintenance extends the lifespan of your appliance.

Advanced Features & Settings

Explore features like Delay Start, temperature adjustments, and spin speed control for customized washing cycles – optimizing performance like Atlanta’s dynamic city planning.

Delay Start Function Explained

The Delay Start function allows you to conveniently postpone the beginning of a wash cycle, fitting laundry routines around your schedule – much like planning activities in a bustling city like Atlanta. This feature is particularly useful for taking advantage of off-peak electricity tariffs, potentially saving energy and costs.

To utilize this function, simply press the ‘Delay Start’ button on the control panel. Each press typically increases the delay time in increments, often displayed in hours. You can set a delay of up to a maximum number of hours, as specified in your model’s specific manual. Once the desired delay is selected, press the ‘Start/Pause’ button.

The washing machine will then count down the delay period before initiating the chosen wash program. Remember to ensure the water supply is connected and the machine is properly loaded before setting the delay. This function offers flexibility and convenience, aligning with a modern lifestyle, similar to the diverse offerings found throughout Atlanta.

Temperature Adjustment Options

Indesit inverter motor washing machines offer a range of temperature settings to cater to various fabric types and washing needs, ensuring optimal cleaning and garment care – much like Atlanta caters to diverse interests. Most models allow you to select temperatures from cold wash (typically 15°C or less) up to a maximum of 90°C.

The control panel usually features dedicated buttons or a dial to adjust the temperature. Lower temperatures are ideal for delicate fabrics and preventing color fading, while higher temperatures are effective for sanitizing and removing stubborn stains. Always check the care labels on your garments before selecting a temperature.

Some models may also include pre-set temperature options for specific programs, such as ‘Eco’ or ‘Delicates’. Understanding these options allows you to tailor each wash cycle for the best possible results, mirroring the personalized experiences available in Atlanta.

Spin Speed Control

Indesit inverter motor washing machines provide adjustable spin speeds, crucial for managing moisture levels and protecting fabrics – similar to how Atlanta manages its bustling energy. Spin speed is measured in revolutions per minute (RPM), and options typically range from 400 RPM to 1600 RPM, though this varies by model.

Lower spin speeds are gentler on delicate items, reducing wrinkles and minimizing fabric stress. Higher spin speeds extract more water, shortening drying times, but may cause more creasing; The control panel features buttons or a dial to select the desired spin speed.

Consider the fabric type when choosing a spin speed; heavier items like towels can withstand higher speeds, while synthetics and delicates require lower settings. Some programs automatically adjust the spin speed based on the selected wash cycle, offering convenience and optimal results, much like Atlanta’s diverse offerings.

Service and Support

For assistance with your Indesit washer, contact customer service or locate authorized repair centers – mirroring Atlanta’s accessible resources.

Review warranty details for coverage information regarding servicing and potential repair needs.

Contacting Indesit Customer Service

Indesit provides multiple avenues for customer support regarding your inverter motor washing machine. For immediate assistance, explore the official Indesit website, which often features a comprehensive FAQ section addressing common issues and troubleshooting steps. This online resource can quickly resolve many queries without needing direct contact.

Alternatively, you can reach Indesit customer service via telephone. Be prepared to have your model number and purchase date readily available to expedite the process. The support team can guide you through diagnostics, offer advice on error codes, and schedule service appointments if necessary. Like Atlanta’s extensive network, Indesit aims for broad accessibility.

Email support is also available, allowing you to detail your issue with supporting documentation. Response times may vary, but this method is ideal for complex problems or when providing images/videos. Remember to retain all communication records for future reference. Finally, social media channels may offer limited support or direct you to appropriate resources.

Finding Authorized Repair Centers

Indesit recommends utilizing authorized repair centers for all servicing needs concerning your inverter motor washing machine, ensuring genuine parts and qualified technicians. Locating these centers is streamlined through the official Indesit website; a dedicated “Service Locator” tool allows you to input your postcode or city – much like planning a trip to Atlanta – to find nearby options.

These authorized centers employ technicians specifically trained on Indesit appliances, guaranteeing accurate diagnostics and effective repairs. Attempting self-repair, especially with complex components like inverter motors, can void your warranty and potentially cause further damage. Always prioritize professional assistance.

When contacting a repair center, inquire about their experience with Indesit inverter technology and request a transparent quote before authorizing any work. Verify their accreditation and ensure they offer a warranty on parts and labor. Choosing an authorized center safeguards the longevity and performance of your washing machine.

Warranty Information and Coverage

Your Indesit inverter motor washing machine is covered by a standard manufacturer’s warranty, protecting against defects in materials and workmanship. The duration varies depending on your region and the specific model purchased; typically, it’s a one-year warranty on parts and labor, mirroring the vibrant energy of a city like Atlanta.

The warranty excludes damage resulting from misuse, improper installation, power surges, or unauthorized repairs – emphasizing the importance of authorized service centers. Keep your proof of purchase (receipt or invoice) readily available as verification.

To make a warranty claim, contact Indesit customer service. They will guide you through the process and arrange for a qualified technician to assess the issue. Review the full warranty terms and conditions detailed in your product manual for complete coverage details and exclusions.

waterworks guide

Waterworks Guide: A Comprehensive Overview

Waterworks encompasses diverse systems‚ from domestic pressure boilers to industrial treatment‚ utilizing key components like valves‚ pumps‚ and monitoring technologies for efficient water solutions․

Waterworks systems represent a critical infrastructure network‚ delivering potable water and managing wastewater for public health and industrial processes; These systems are complex‚ integrating raw water acquisition‚ sophisticated treatment methodologies‚ and extensive distribution networks․ Understanding these systems requires recognizing their historical evolution‚ from rudimentary aqueducts to modern‚ computerized facilities․

Essential components include sources like rivers and aquifers‚ treatment processes such as coagulation and disinfection‚ and distribution elements like piping and pumping stations․ Domestic waterworks‚ differing from large-scale municipal operations‚ focus on localized pressure and supply․ Furthermore‚ integration with wastewater systems is crucial for sustainable water management․ Modern waterworks increasingly rely on telemetry and SCADA systems for efficient monitoring and control․

Historical Development of Waterworks

The history of waterworks stretches back millennia‚ beginning with ancient civilizations’ reliance on aqueducts and basic sanitation․ Early Roman systems demonstrated sophisticated engineering for water conveyance․ Throughout the Middle Ages‚ development stagnated‚ with reliance on wells and localized springs․

The 19th century witnessed a resurgence driven by industrialization and urbanization‚ necessitating large-scale public water systems․ This era saw advancements in filtration and pumping technologies․ The 20th and 21st centuries brought computerized monitoring‚ SCADA systems‚ and a growing focus on water treatment for purity and sustainability․ Modern waterworks now integrate wastewater management‚ reflecting a holistic approach to water resource management‚ evolving from simple supply to complex‚ interconnected systems․

Key Components of a Waterworks System

Essential components include water sources‚ treatment processes‚ distribution networks with piping and pumps‚ and monitoring systems—all working cohesively for safe water delivery․

Water Sources: Raw Water Acquisition

The foundation of any waterworks system lies in securing reliable raw water sources․ Traditionally‚ rivers‚ lakes‚ and reservoirs have served as primary intakes‚ offering substantial volumes but often requiring extensive treatment due to varying quality․ Increasingly‚ groundwater from aquifers is utilized‚ frequently providing naturally filtered water‚ though susceptible to depletion and contamination․

Effective raw water acquisition necessitates careful source selection‚ considering factors like yield‚ accessibility‚ and potential pollutants․ Intake structures‚ such as weirs and intake towers‚ are crucial for drawing water efficiently while minimizing debris entry․ Protecting these sources from contamination—through watershed management and buffer zones—is paramount for ensuring long-term water security and reducing treatment costs․ Sustainable practices are vital for responsible water resource management․

Water Treatment Processes

Transforming raw water into potable water demands a series of sophisticated treatment processes․ These stages aim to remove contaminants‚ ensuring water safety and palatability․ Initial steps often involve coagulation and flocculation‚ where chemicals neutralize charged particles‚ causing them to clump together for easier removal․ Subsequently‚ filtration techniques – utilizing sand‚ gravel‚ or membranes – physically separate these clumps and remaining impurities․

Crucially‚ disinfection methods eliminate harmful pathogens․ Chlorination remains prevalent‚ but alternatives like UV irradiation and ozonation are gaining traction․ Each process requires precise control and monitoring to optimize effectiveness and comply with stringent water quality standards․ Industrial applications may necessitate specialized treatment for specific contaminants‚ tailoring the process to the intended use․

Coagulation and Flocculation

Coagulation and flocculation represent the initial critical stages in water treatment‚ preparing water for subsequent filtration․ Coagulants‚ like aluminum sulfate or ferric chloride‚ neutralize the electrical charges of fine‚ dispersed particles in raw water․ This neutralization allows these particles to begin clumping together – a process called flocculation․ Gentle mixing encourages these smaller clumps‚ known as flocs‚ to grow larger and heavier․

Effective floc formation is vital for efficient removal․ The size and strength of the flocs directly impact their settling rate and filterability․ Careful control of coagulant dosage‚ pH levels‚ and mixing intensity are essential to optimize this process‚ ensuring maximum contaminant removal before filtration begins․

Filtration Techniques

Filtration is a core process in waterworks‚ removing suspended solids and impurities following coagulation and flocculation․ Several techniques are employed‚ each suited to different water qualities and treatment goals․ Rapid sand filtration utilizes layers of sand and gravel to physically strain out particles‚ requiring periodic backwashing to remove accumulated debris․

Slow sand filtration‚ a simpler method‚ relies on biological activity within the filter bed for enhanced purification․ More advanced techniques include membrane filtration – microfiltration‚ ultrafiltration‚ nanofiltration‚ and reverse osmosis – offering increasingly fine particle removal․ The choice of filtration method depends on the desired water purity and the characteristics of the raw water source․

Disinfection Methods

Disinfection is a crucial step in waterworks‚ eliminating harmful pathogens to ensure safe drinking water․ Chlorination‚ the most common method‚ utilizes chlorine gas or compounds to kill bacteria and viruses‚ providing residual protection within the distribution system․ However‚ it can create disinfection byproducts․

Alternative methods include ultraviolet (UV) disinfection‚ which uses UV light to inactivate microorganisms without adding chemicals‚ and ozonation‚ employing ozone gas for powerful oxidation and disinfection․ Chloramination‚ combining chlorine and ammonia‚ offers longer-lasting disinfection with fewer byproducts․ The selection of a disinfection method depends on factors like water quality‚ cost‚ and regulatory requirements․

Distribution Network Infrastructure

Distribution networks rely on piping‚ pumps‚ and valves – essential components – to deliver treated water efficiently‚ encompassing service lines and computerized monitoring systems․

Piping Materials and Specifications

Piping constitutes a critical element within waterworks distribution‚ demanding careful material selection based on durability‚ corrosion resistance‚ and cost-effectiveness․ Common materials include ductile iron‚ known for its strength and longevity‚ and PVC‚ favored for its lighter weight and resistance to chemical degradation․

Specifications dictate pipe diameter‚ wall thickness‚ and joining methods – crucial for maintaining system integrity and minimizing leakage․ Standards‚ such as those set by ANSI and AWWA‚ ensure consistent quality and performance․

Factors like soil conditions‚ water pressure‚ and potential for seismic activity influence material choice and design considerations․ Proper installation techniques‚ adhering to established guidelines‚ are paramount for a reliable and long-lasting distribution network․ The selection process balances performance requirements with budgetary constraints․

Pumps and Pumping Stations

Pumping stations are integral to waterworks‚ providing the necessary pressure to move water throughout the distribution network‚ especially when gravity flow is insufficient․ Pumps come in various types – centrifugal‚ turbine‚ and positive displacement – each suited for specific flow rates and head requirements․

Station design incorporates multiple pumps for redundancy‚ ensuring continuous supply during maintenance or emergencies․ Control systems automate pump operation‚ optimizing energy efficiency and responding to fluctuating demand․

Regular maintenance‚ including impeller inspection and seal replacement‚ is crucial for reliable performance․ Proper sizing and selection of pumps‚ considering system curves and operational parameters‚ are essential for efficient and cost-effective water delivery․ These stations often include telemetry for remote monitoring․

Valves: Types and Functions

Valves are critical control components within waterworks systems‚ regulating flow and pressure․ Gate valves provide on/off control‚ while butterfly valves offer efficient throttling․ Check valves prevent backflow‚ safeguarding water quality․ Crucially‚ air release valves vent accumulated air‚ preventing disruptions and corrosion․

Pressure reducing valves (PRVs) maintain downstream pressure within safe limits‚ protecting infrastructure․ Anti-water hammer systems‚ utilizing surge tanks or air chambers‚ mitigate damaging pressure surges caused by rapid valve closures․

Proper valve selection‚ installation‚ and maintenance are vital for system integrity․ Regular inspection and replacement of worn seals ensure leak-free operation and optimal performance‚ contributing to efficient water distribution and minimizing losses․

Air Release Valves

Air release valves are essential components in waterworks systems‚ strategically placed at high points to automatically vent accumulated air․ Trapped air can cause reduced flow‚ increased pumping costs‚ and even water hammer events – damaging pressure surges․ These valves efficiently release air while preventing water leakage‚ maintaining optimal system performance․

Different types exist‚ including orifice valves for continuous air release and ball float valves for intermittent venting․ Proper sizing is crucial; valves must handle anticipated air volumes․ Regular inspection and maintenance are vital to ensure they remain unobstructed and function correctly‚ preventing operational issues and extending pipeline lifespan․

Effective air release contributes to efficient water delivery and protects the integrity of the entire waterworks infrastructure․

Pressure Reducing Valves

Pressure Reducing Valves (PRVs) are critical for managing water pressure within distribution networks‚ particularly in areas with fluctuating supply or significant elevation changes․ They automatically reduce higher inlet pressures to a safer‚ consistent downstream pressure‚ protecting pipes‚ fittings‚ and appliances from damage․

PRVs prevent excessive stress on the system‚ minimizing leaks and extending infrastructure lifespan․ Direct-acting and pilot-operated designs cater to varying flow rates and pressure differentials․ Proper selection and installation are paramount‚ considering flow requirements and desired outlet pressure․

Regular maintenance‚ including inspection and cleaning‚ ensures reliable operation and prevents pressure surges or failures‚ safeguarding the water supply․

Anti-Water Hammer Systems

Anti-water hammer systems are essential for protecting waterworks infrastructure from the destructive forces of pressure surges‚ commonly known as water hammer․ These surges occur when fluid flow is abruptly stopped or changed‚ creating shockwaves within the piping network․

Direct-acting and accumulator-based systems mitigate these impacts․ Direct-acting valves quickly open and close to absorb pressure fluctuations‚ while accumulators utilize compressed air or gas to cushion the surge․ Proper sizing and placement are crucial for effective protection․

Implementing these systems prevents pipe bursts‚ valve failures‚ and damage to connected equipment‚ ensuring the long-term reliability and safety of the water supply․

Monitoring and Control Systems

Telemetry and SCADA systems‚ alongside water quality monitoring‚ are vital for real-time data acquisition and automated control within complex waterworks operations․

Telemetry and SCADA Systems

Telemetry and Supervisory Control and Data Acquisition (SCADA) systems represent the nervous system of modern waterworks‚ enabling remote monitoring and control of distributed infrastructure․ These systems gather real-time data from various points – pumping stations‚ treatment facilities‚ and distribution networks – transmitting it to a central control room․

This data includes flow rates‚ pressure levels‚ water quality parameters‚ and equipment status․ SCADA systems allow operators to visualize this information‚ identify anomalies‚ and make informed decisions․ Automated control features enable remote adjustments to pump speeds‚ valve positions‚ and chemical dosing‚ optimizing performance and responding to changing conditions․ Computerized telemetry monitoring is crucial for efficient operation and rapid response to potential issues‚ ensuring reliable water delivery and minimizing disruptions․

Water Quality Monitoring

Water quality monitoring is a critical aspect of waterworks‚ ensuring the delivery of safe and potable water to consumers․ Continuous monitoring involves analyzing various physical‚ chemical‚ and biological parameters throughout the treatment and distribution processes․ Key indicators include pH levels‚ turbidity‚ chlorine residual‚ and the presence of contaminants like bacteria and heavy metals․

Advanced sensors and analytical instruments provide real-time data‚ enabling operators to detect and address any deviations from established standards․ This proactive approach safeguards public health and maintains compliance with regulatory requirements․ Data collected informs treatment adjustments and identifies potential sources of contamination‚ contributing to a robust and reliable water supply․

Specific Waterworks Applications

Waterworks finds application in domestic systems‚ industrial treatment for cooling and CCM equipment‚ and integrated wastewater solutions‚ showcasing its versatile utility and importance․

Domestic Waterworks Operation

Domestic waterworks‚ essential for residential water supply‚ rely on a carefully orchestrated system of components․ The core of these systems often includes a pressure boiler‚ responsible for maintaining consistent water pressure throughout the household․ A robust pump is crucial for drawing water from the source – be it a well or a municipal supply – and distributing it effectively․

Furthermore‚ the interplay between these elements and the overall plumbing network dictates the system’s performance․ Maintaining adequate pressure is paramount‚ and this is often achieved through pressure regulation․ Modern domestic systems increasingly incorporate computerized telemetry monitoring for efficient operation and early detection of potential issues․ These systems ensure a reliable and safe water supply for everyday needs․

Industrial Water Treatment Systems

Industrial water treatment systems are critical for maintaining operational efficiency and product quality across diverse manufacturing processes․ These systems often involve sophisticated water cleaning plants tailored to specific industrial needs‚ such as providing makeup water for cooling systems or Closed-Circuit Cooling (CCM) equipment․

Effective treatment ensures the removal of impurities that could compromise equipment performance or contaminate final products․ Waterworks provides comprehensive solutions‚ leveraging in-house components and expertise to design and implement customized systems․ These solutions address unique challenges‚ optimizing water usage and minimizing environmental impact․ Proper water treatment is not merely a utility‚ but a vital component of industrial sustainability․

Wastewater Systems Integration

Integrating wastewater systems with overall waterworks infrastructure is crucial for responsible resource management and environmental protection․ Modern approaches focus on minimizing discharge and maximizing water reuse within industrial and municipal settings․ This integration often involves advanced treatment technologies to remove pollutants and contaminants from wastewater streams․

Waterworks offers solutions that seamlessly connect water and wastewater systems‚ optimizing performance and reducing operational costs․ These integrated systems can include components for pre-treatment‚ biological treatment‚ and advanced filtration․ Effective integration requires careful planning and consideration of regulatory requirements‚ ensuring compliance and sustainability․ Ultimately‚ a holistic approach to water management benefits both the environment and the bottom line․

Maintenance and Troubleshooting

Regular preventative maintenance schedules and swift resolution of common issues—like valve malfunctions—are vital for ensuring the longevity and reliable operation of waterworks systems․

Common Issues and Solutions

Waterworks systems‚ despite robust design‚ encounter predictable challenges․ Leaks within piping networks are frequent‚ often stemming from corrosion or joint failures‚ requiring immediate repair or replacement․ Pump failures‚ due to wear and tear or electrical issues‚ disrupt water flow and necessitate prompt servicing or component exchange․

Valve malfunctions‚ including those affecting air release‚ pressure reduction‚ or anti-water hammer functions‚ can compromise system efficiency and safety․ Sediment buildup within pipes and treatment components reduces capacity and water quality‚ demanding regular flushing and cleaning․

Addressing these issues involves routine inspections‚ preventative maintenance‚ and readily available replacement parts․ Utilizing computerized telemetry monitoring aids in early detection of anomalies‚ minimizing downtime and ensuring consistent water delivery․ Skilled technicians are crucial for diagnosing complex problems and implementing effective solutions․

Preventative Maintenance Schedules

Establishing robust preventative maintenance schedules is paramount for waterworks longevity․ Daily checks should encompass monitoring pump performance‚ valve functionality‚ and pressure readings via telemetry systems․ Weekly inspections should focus on identifying leaks in piping‚ assessing water quality parameters‚ and verifying alarm system responsiveness․

Monthly routines demand thorough examination of pump seals‚ motor bearings‚ and valve components‚ alongside sediment removal from filters and tanks․ Quarterly schedules necessitate comprehensive system flushing to eliminate buildup and corrosion byproducts․

Annual overhauls should include detailed inspections of all major components‚ including pumps‚ valves‚ and control systems‚ alongside calibration of monitoring equipment․ Adhering to these schedules minimizes downtime‚ extends equipment lifespan‚ and ensures consistent‚ safe water delivery․

10 minute haggadah pdf

What is a 10-Minute Haggadah?

A 10-Minute Haggadah is designed for quick‚ multi-generational virtual Seders‚ especially engaging for children aged five and up․
It efficiently distills the seder experience to its core elements․

This streamlined version allows families to fulfill the commandment of sharing the Exodus story‚ even with limited time or attention spans․

Resources are available for download‚ offering a concise yet meaningful Passover celebration․

Origins and Purpose

The 10-Minute Haggadah emerged from the need for accessible Passover Seders‚ particularly during times demanding brevity‚ like virtual gatherings․
Its purpose is to maintain the seder’s core message – recounting the Exodus – while accommodating shorter attention spans and busy schedules․

Rabbi Yonah Bookstein authored a version specifically for this purpose‚ aiming to fulfill the biblical commandment of teaching the story to future generations in a concise format․
PDF availability facilitates easy sharing and use․

Target Audience: Multi-Generational & Children

The 10-Minute Haggadah intentionally caters to diverse age groups‚ from young children (five years and up) to adults․
Its simplified narrative and shorter duration make it ideal for families with varying levels of seder experience and attention․

The PDF format allows easy distribution for multi-generational virtual Seders‚ ensuring everyone can participate and connect with the Passover story in a meaningful way․

Finding a “10 Minute Haggadah” PDF Online

A free 10-Minute Haggadah PDF is readily available for download․ Websites offer this resource for virtual Seders and family use‚ simplifying the Passover experience․

Availability of Free Downloads

Numerous sources provide a free 10-Minute Haggadah in PDF format‚ making Passover accessible to all․ These downloads cater to those seeking a shorter‚ more focused seder experience․

Websites dedicated to Jewish holidays and resources frequently host these Haggadahs‚ ensuring easy access for families and individuals․ The availability promotes inclusive participation․

Websites Offering the Haggadah

Several websites readily offer the 10-Minute Haggadah for download․ Our website provides access to seven different Haggadahs‚ including this concise version․

Other platforms specializing in Jewish content and holiday resources also host the PDF․ These sites aim to support first-time seder leaders and families seeking streamlined celebrations․

File Format and Compatibility (PDF)

The 10-Minute Haggadah is primarily available as a PDF document‚ ensuring broad compatibility across various devices․

PDF format maintains formatting consistency‚ crucial for a ritual text․ It’s easily viewable on computers‚ tablets‚ and smartphones‚ and readily printable for traditional use․

No special software is typically required for access․

Key Features of the 10-Minute Haggadah

Key features include distilling the seder to essentials‚ focusing on the Exodus story‚ and adapting easily for virtual Seders․ It’s concise and meaningful!

Distilling the Seder to Essentials

This Haggadah prioritizes core elements‚ removing lengthy discussions and complex interpretations to create a focused experience․ It efficiently conveys the central themes of Passover – slavery and freedom – within a ten-minute timeframe․

The streamlined format ensures all participants‚ especially children‚ can remain engaged‚ while still fulfilling the mitzvah of recounting the Exodus story․ It’s about impactful brevity!

Focus on the Exodus Story

The 10-Minute Haggadah centers the narrative of the Israelites’ liberation from Egyptian slavery․ It emphasizes the journey from oppression to freedom‚ making it the central theme of the Seder․

This focused approach ensures the core message of Passover – remembering and appreciating freedom – resonates with all participants‚ fostering a meaningful connection to Jewish history․

Adaptation for Virtual Seders

The 10-Minute Haggadah is specifically crafted for multi-generational virtual Seders‚ acknowledging the challenges of remote celebrations․ Its brevity maintains engagement across distances and varying attention spans․

This format facilitates a shared experience‚ even when physically apart‚ ensuring the Passover story is accessible and enjoyable for all participants in a digital setting․

The Four Questions in the 10-Minute Seder

The 10-Minute Seder includes four questions‚ simplified for children‚ yet retaining the traditional text’s essence․ Modern interpretations enhance understanding and engagement․

These questions spark curiosity about the Passover story and its significance․

Simplified Explanation for Children

The 10-Minute Haggadah presents the Four Questions in a way that’s easily digestible for young minds․ It focuses on why Passover is different from other nights‚ avoiding complex theological discussions․

The explanations emphasize the Exodus story’s core message of freedom from slavery‚ making it relatable and memorable for children․ This approach fosters participation and understanding․

It’s designed to spark curiosity and encourage family conversation about the Passover tradition․

Traditional Text & Modern Interpretation

The 10-Minute Haggadah balances reverence for traditional Passover texts with a contemporary approach․ While retaining essential elements like the Four Questions‚ it streamlines lengthy passages for brevity․

It offers a modern interpretation of the Exodus story‚ emphasizing its universal themes of liberation and social justice․ This adaptation makes the seder relevant to modern families․

The goal is accessibility without sacrificing the core meaning of the holiday․

Dayenu and its Significance

Dayenu‚ meaning “it would have been enough‚” plays a key role‚ with participants reciting “Dayenu” after each blessing mentioned in the 10-Minute Seder․

This highlights gratitude for even partial redemption‚ reinforcing the core message of the Passover celebration․

The Meaning of “Dayenu”

Dayenu‚ a Hebrew word expressing complete satisfaction‚ translates to “it would have been enough․” Within the 10-Minute Haggadah‚ it acknowledges gratitude for each gift God bestowed upon the Israelites during their Exodus․

Reciting “Dayenu” after each blessing emphasizes that even partial redemption is worthy of profound thankfulness‚ fostering appreciation and a deeper connection to the Passover story․

It’s a powerful expression of contentment and faith․

Role in the 10-Minute Haggadah

In the concise format of the 10-Minute Haggadah‚ “Dayenu” maintains its significance as a pivotal moment of gratitude․ It’s strategically included to reinforce the theme of appreciating each step towards freedom․

The communal recitation of “Dayenu” actively engages participants‚ even in a shortened seder‚ and highlights the blessings received throughout the Exodus narrative․

It’s a key element in maintaining the spirit of Passover․

Leading a 10-Minute Seder

The seder leader warmly welcomes participants to the abbreviated experience‚ emphasizing that despite its brevity‚ the core meaning remains vital․

Begin by stating‚ “Tonight‚ we’re keeping it short‚ but the meaning is just as important!”

Guide the group through the essential elements․

Role of the Seder Leader

The Seder leader plays a crucial role in navigating this condensed experience‚ ensuring engagement and understanding for all ages․

They initiate the 10-minute Seder with a welcoming statement‚ highlighting the importance of the Exodus story despite the shortened format․

Effectively guiding participants through key moments‚ like the Four Questions and Dayenu‚ is essential for a meaningful celebration․

Welcoming Participants

Welcoming participants to the 10-minute Seder sets a positive tone‚ acknowledging the unique format․ The leader begins by explaining the intention – a concise yet meaningful Passover experience․

Acknowledging both seasoned attendees and newcomers fosters inclusivity․

A warm introduction emphasizes the shared goal of remembering the Exodus story and celebrating freedom together‚ despite the time constraint․

Thematic Elements & Core Messages

The 10-Minute Haggadah centers on the themes of slavery and freedom‚ emphasizing the importance of storytelling to connect generations with the Exodus narrative․

It aims to convey the core message of remembering the past and valuing liberty․

Slavery and Freedom

The 10-Minute Haggadah powerfully highlights the transition from slavery to freedom‚ a central theme of Passover․ It focuses on recounting the Exodus story‚ reminding participants of the Israelites’ oppression in Egypt․

This concise seder emphasizes the importance of appreciating liberty and recognizing the ongoing struggle for freedom for all people‚ fostering empathy and reflection․

The narrative serves as a potent reminder of historical struggles and the value of human dignity․

The Importance of Storytelling

The 10-Minute Haggadah underscores the vital role of storytelling in preserving history and transmitting values across generations․ The seder was created to fulfill the biblical commandment of teaching the Exodus narrative․

By sharing the story of liberation‚ families connect with their heritage and reinforce the importance of remembering past struggles and celebrating freedom․

This concise format prioritizes impactful narrative delivery․

Comparing Different Haggadah Versions

Traditional Haggadahs are extensive‚ while 10-Minute versions prioritize brevity․ Several shortened options exist‚ offering varying levels of detail for diverse family needs and preferences․

Resources provide seven different Haggadah downloads․

Traditional Haggadahs vs․ 10-Minute Versions

Traditional Haggadahs are comprehensive texts‚ rich with historical context‚ interpretations‚ and lengthy prayers‚ often spanning several hours for a complete Seder observance․

Conversely‚ 10-Minute Haggadahs‚ like the one by Rabbi Bookstein‚ drastically condense the ritual‚ focusing on the core Exodus narrative and essential blessings․

This streamlined approach prioritizes accessibility and engagement‚ particularly for families with young children or time constraints‚ while still fulfilling the mitzvah of retelling the story․

Other Shortened Haggadah Options

Beyond the 10-Minute Haggadah‚ several other abbreviated versions cater to those seeking a quicker Seder experience․ Websites offer seven different Haggadah downloads‚ providing varied approaches to condensing the traditional text․

These alternatives often prioritize key elements like the Four Questions and the telling of the Exodus story‚ streamlining prayers and discussions․

The goal remains to maintain the essence of Passover while accommodating modern schedules and diverse family needs․

Resources for First-Time Seder Leaders

Online guides and tutorials‚ alongside multiple Haggadah downloads‚ are readily available․ These resources simplify leading a 10-minute Seder‚ even for beginners!

Websites provide support for a successful and meaningful Passover experience․

Online Guides and Tutorials

Numerous online resources assist first-time Seder leaders in navigating the 10-minute Haggadah․ Websites offer step-by-step instructions‚ explaining each element of the abbreviated seder․

These guides clarify the roles within the seder‚ ensuring a smooth flow and meaningful experience for all participants․ Tutorials often include pronunciation guides and explanations of key traditions․

They empower individuals to confidently lead a concise‚ yet impactful‚ Passover celebration․

Available Haggadah Downloads (Multiple Options)

Several websites provide free 10-minute Haggadah PDFs for immediate download․ These options cater to diverse preferences‚ offering variations in design and layout․

Resources include Rabbi Bookstein’s version‚ specifically crafted for virtual Seders and families․ Multiple downloads allow users to select a format best suited to their needs․

Finding the perfect PDF ensures a seamless and accessible Passover experience for everyone involved․

The Role of Blessings in the Seder

Essential blessings are included within the 10-minute Haggadah‚ maintaining the spiritual core of the seder․

Their recitation holds significance‚ connecting participants to tradition and the meaning of Passover․

Essential Blessings Included

The 10-Minute Haggadah incorporates key blessings to honor the Passover observance․ These include the blessing over wine‚ a central element symbolizing freedom‚ and the blessing recited before the matzah․

These blessings‚ though concise‚ maintain the religious significance of the seder‚ ensuring participants acknowledge and appreciate the historical and spiritual context of the holiday․

They provide a foundational element within the abbreviated format․

Significance of Recitation

Recitation of blessings within the 10-Minute Haggadah isn’t merely formulaic; it’s a vital connection to generations past and the core themes of Passover․

These words express gratitude for freedom and remembrance of the Exodus‚ reinforcing the story’s enduring message․

Even in a shortened seder‚ blessings maintain spiritual depth and meaning․

Adapting the Seder for Different Ages

The 10-Minute Haggadah’s brevity makes it ideal for varied ages; engaging younger children is easier‚ while teens and adults appreciate the focused narrative․

Engaging Younger Children

Younger children benefit from the 10-Minute Haggadah’s concise format‚ maintaining their attention during the seder․ The streamlined story focuses on the core Exodus narrative‚ making it easily digestible․

Interactive elements and simplified explanations of traditions‚ like the Four Questions‚ further enhance their involvement․ This approach fosters a positive early association with Passover․

Involving Teenagers and Adults

Even with its brevity‚ the 10-Minute Haggadah provides a framework for meaningful discussion with teenagers and adults․ It encourages reflection on the themes of slavery and freedom‚ prompting contemporary connections․

The focused narrative allows for deeper exploration of the Exodus story’s relevance‚ fostering intergenerational dialogue and shared understanding during the seder․

The “Next Year in Jerusalem” Tradition

The 10-Minute Haggadah includes the traditional closing wish‚ “Next year in Jerusalem‚” maintaining a vital historical and hopeful element within the abbreviated seder․

Meaning and Historical Context

“Next year in Jerusalem” reflects a centuries-old yearning for a return to Zion‚ originating during the exile from the Land of Israel․

It embodies hope for redemption and the rebuilding of Jewish life in its ancestral homeland․ Even within the concise 10-Minute Haggadah‚ this powerful aspiration is preserved‚ connecting participants to a long and poignant history․

The phrase serves as a reminder of collective identity and enduring faith․

Inclusion in the 10-Minute Haggadah

Despite its brevity‚ the 10-Minute Haggadah intentionally retains the tradition of concluding with “Next year in Jerusalem․”

This inclusion underscores the enduring hope for future freedom and a return to spiritual wholeness‚ even within a shortened seder format․

It maintains a vital link to Jewish history and collective aspirations․

Downloading and Printing the PDF

A free Passover Haggadah is readily available for download‚ enabling a quick and easy seder․

Ensure print quality for a clear reading experience during your celebration․

Ensuring Print Quality

Printing the 10-Minute Haggadah PDF requires attention to detail for optimal readability․ Select “actual size” or “100% scale” in your print settings to avoid cropping content․

Use a high-quality paper stock for sharper text and images․ A test print of a single page is recommended before printing the entire Haggadah‚ verifying clarity and layout․

Adjust printer settings as needed to achieve the best possible visual presentation for your seder․

Accessibility Considerations

When using the 10-Minute Haggadah PDF‚ consider those with visual impairments․ Ensure sufficient font size and contrast for easy reading․

Digital versions allow screen readers to function effectively․ Providing a plain text version alongside the PDF enhances inclusivity․

Large print options and clear layouts benefit all participants‚ fostering a welcoming seder experience for everyone․

Future Trends in Haggadah Design

Digital Haggadahs and interactive experiences are rising‚ alongside continued demand for shorter Seders like the 10-Minute Haggadah․

Expect more personalized and engaging formats‚ blending tradition with modern technology for broader accessibility․

Digital Haggadahs and Interactive Experiences

Digital Haggadahs‚ including accessible 10-Minute Haggadah PDFs‚ are evolving beyond static text․ Expect interactive elements like videos‚ animations‚ and built-in discussion prompts․

These innovations aim to enhance engagement‚ particularly for younger generations and virtual Seders․ Features like collaborative storytelling and customizable templates will become increasingly common‚ fostering a more dynamic Passover experience․

Continued Demand for Shorter Seders

The popularity of the 10-Minute Haggadah PDF reflects a growing need for accessible and time-efficient Seder experiences․ Modern families often face scheduling constraints and varying levels of engagement․

Consequently‚ condensed versions that prioritize core themes—like freedom and storytelling—will likely remain in high demand‚ ensuring Passover traditions endure for generations․

toro 521 snowblower manual

Toro 521 Snowblower Manual: A Comprehensive Guide

This manual details operation, maintenance, and troubleshooting for the Toro 521 snowblower, covering engine specifics, drive systems, and component details.

The Toro 521 snowblower is a powerful and reliable machine designed for efficient snow removal. This manual serves as a comprehensive guide, providing essential information for safe operation and long-lasting performance. Understanding your snowblower’s features, from the engine specifications to the auger and impeller system, is crucial. Whether you’re a first-time user or an experienced operator, this resource will help you maximize its capabilities.

Proper assembly, operation, and maintenance, as detailed within, will ensure years of dependable service. Familiarize yourself with safety precautions and troubleshooting steps to address potential issues effectively. This guide also covers warranty information and locating replacement parts.

Safety Precautions and Warnings

Prioritize safety when operating the Toro 521 snowblower. Always disconnect the spark plug wire before performing any maintenance or adjustments to prevent accidental starting. Never operate the machine with missing or damaged parts. Keep hands and feet clear of the auger and impeller at all times – they can cause serious injury.

Be mindful of bystanders, pets, and objects in the operating area. Never allow children to operate the snowblower. Wear appropriate clothing, including eye protection and sturdy footwear. Avoid operating on steep slopes and be cautious of hidden obstacles. Review all warnings in this manual before each use.

Understanding the Snowblower Components

The Toro 521 snowblower comprises several key systems. The engine provides power, while the auger and impeller work in tandem to collect and discharge snow. A robust drive system, featuring traction control, ensures efficient movement across various snow conditions. The chute directs the snow stream, adjustable for distance and angle.

Familiarize yourself with the handle assembly, auger housing, and their respective adjustments. Understanding these components is crucial for proper operation, maintenance, and troubleshooting. Refer to detailed diagrams within this manual for precise locations and functions.

Engine Specifications and Overview

The Toro 521 snowblower is typically equipped with a powerful 4-cycle engine, designed for reliable cold-weather starting. Key specifications include displacement (typically around 208cc), fuel capacity (approximately 0.8 gallons), and oil capacity (around 18 ounces). This engine delivers sufficient power for handling substantial snowfall.

Regular maintenance, including oil changes and spark plug replacements, is vital for optimal performance. Always use the recommended oil type and follow the specified maintenance schedule. Understanding these engine details ensures longevity and efficient snow removal.

Auger and Impeller System Details

The Toro 521 utilizes a two-stage auger system, effectively breaking up and conveying snow. The auger, constructed from durable materials, pulls snow into the impeller housing. The high-speed impeller then forcefully discharges the snow through the chute. Shear pins protect the system from damage caused by obstructions.

Regular inspection of the auger blades and impeller for wear is crucial. Prompt replacement of worn components maintains optimal throwing distance and prevents strain on the engine. Proper maintenance ensures efficient snow removal and prolongs system life.

Drive System and Traction Control

The Toro 521 features a self-propelled drive system, simplifying operation on varied terrains. Utilizing a robust transmission, it provides ample power for navigating snowdrifts and inclines. Traction control is enhanced by tire tread design, maximizing grip on slippery surfaces.

The drive speed is adjustable, allowing users to match pace to conditions. Regular inspection of the drive belt and transmission fluid levels is essential for smooth operation. Maintaining proper tire pressure also contributes to optimal traction and maneuverability, ensuring efficient snow clearing.

Assembly Instructions

Before initial use, careful assembly is crucial for safe and effective operation of your Toro 521 snowblower. Begin by unpacking all components and verifying against the parts list. Attach the handle to the auger housing using the provided hardware, ensuring secure fastening.

Next, install the chute assembly, confirming proper rotation functionality. Double-check all bolts and connections for tightness. Refer to the diagrams for correct orientation of parts. Proper assembly guarantees optimal performance and longevity of your snow removal equipment.

Handle Assembly and Adjustments

Securely attaching the handle is the first step in Toro 521 assembly; Align the handle posts with the designated slots on the snowblower’s chassis and fasten using the supplied bolts and washers. Ensure a snug fit, but avoid over-tightening.

Adjust the handle height to a comfortable operating position for optimal control. Most models offer multiple height settings. Regularly check bolt tightness during use. Proper handle adjustment minimizes strain and maximizes maneuverability during snow removal, enhancing user comfort and efficiency.

Auger Housing Installation

Proper auger housing installation is crucial for efficient snow removal with the Toro 521. Carefully align the auger housing with the mounting points on the snowblower’s frame. Secure it using the provided hardware, ensuring all bolts are tightened to the manufacturer’s specified torque.

Verify the auger rotates freely within the housing before proceeding. Incorrect installation can lead to damage or reduced performance. Double-check all connections for stability before operation, guaranteeing safe and effective snow clearing capabilities.

Chute Installation and Rotation

Securely attaching the chute is vital for directing snow flow on your Toro 521. Align the chute with the designated mounting points on the auger housing. Fasten it using the provided hardware, ensuring a snug fit but allowing for rotational movement.

The chute should rotate smoothly through its full range of motion. Test this functionality before each use. Proper rotation enables you to control the snow’s trajectory, preventing obstructions and maximizing clearing efficiency. Regularly inspect the rotation mechanism for any binding or damage.

Operating Instructions

Before operation, ensure the area is clear of people and objects. Always check oil levels and fuel before starting. For a cold start, engage the choke and follow the starting sequence detailed in the manual. A warm start typically requires no choke.

Once running, adjust the snow throwing distance and angle using the designated controls. Be mindful of wind direction to avoid snow being blown back towards you. Operate the snowblower at a safe and comfortable pace, avoiding sudden maneuvers.

Starting the Engine – Cold Start Procedure

To initiate a cold start, ensure the fuel valve is open and the throttle is set to the ‘choke’ position. Firmly press the primer bulb several times until fuel is visible. Engage the safety bail and pull the starter rope with a smooth, consistent motion. If the engine doesn’t start after a few attempts, repeat the priming and pulling process.

Once the engine sputters, gradually reduce the choke setting until it runs smoothly. Allow the engine to warm up for a few minutes before engaging the auger.

Starting the Engine – Warm Start Procedure

For a warm start, verify the fuel valve is open and the throttle isn’t in the choke position. Engage the safety bail firmly, and pull the starter rope with a swift, deliberate motion. The engine should ignite with minimal effort due to retained heat. If it fails to start immediately, briefly attempt priming the bulb once or twice.

Avoid excessive priming, as it can flood the engine. Allow a short warm-up period before engaging the auger and commencing snow removal operations.

Adjusting Snow Throwing Distance and Angle

To modify throwing distance, utilize the distance adjustment lever located near the chute control. Moving the lever adjusts the impeller speed, impacting how far the snow is expelled. For angle adjustments, rotate the chute using the chute rotation knob. This allows directing the snow stream left or right.

Fine-tune these settings based on snow density and wind conditions. Experiment to achieve optimal performance and avoid unnecessary strain on the machine. Remember to disengage the auger before making significant adjustments.

Maintenance Schedule

Regular maintenance ensures optimal performance and extends the life of your Toro 521 snowblower. Key tasks include checking the oil level before each use and changing the oil after every 25 hours of operation, or annually. Inspect the spark plug annually, replacing it if necessary.

Shear pins should be checked before each use and replaced immediately if damaged. Periodically inspect the auger and scraper bar for wear, and tighten any loose bolts. Following this schedule prevents costly repairs and maintains efficiency.

Oil Change Procedures

To change the oil on your Toro 521, ensure the engine is warm but not hot. Locate the oil drain plug and position a suitable container underneath. Remove the plug, allowing the oil to drain completely. Replace the plug and tighten securely.

Next, remove the oil fill cap and add the recommended oil type and quantity, as specified in the manual. Check the oil level with the dipstick, adding more if needed. Properly dispose of the used oil at a recycling center.

Spark Plug Replacement

Replacing the spark plug on your Toro 521 is crucial for optimal engine performance. First, disconnect the spark plug wire; Using a spark plug socket, carefully remove the old spark plug. Inspect the new spark plug for damage and ensure it’s the correct type, referencing your manual.

Gap the new spark plug to the specified measurement. Thread the new plug in by hand to avoid cross-threading, then tighten with the socket. Reconnect the spark plug wire securely. This ensures proper ignition and efficient operation.

Shear Pin Replacement

Shear pins protect the auger and impeller from damage during obstructions. When a pin shears, the auger stops. Disconnect the spark plug wire for safety. Locate the shear pin(s) on the auger shaft – typically behind the auger housing.

Use a punch and hammer to drive out the broken pin remnants. Insert a new shear pin, ensuring proper alignment. Secure it with the retaining clip or bolt. Always carry spare shear pins, as they are consumable items. Replacing them promptly restores snow removal functionality.

Troubleshooting Common Issues

This section addresses frequent problems encountered with the Toro 521. If the engine won’t start, check fuel levels, the spark plug, and ensure the safety interlocks are engaged correctly. For an auger that won’t engage, inspect the shear pins and drive belt. Drive system issues often stem from belt slippage or a faulty drive cable.

Always disconnect the spark plug before performing any inspection or repair. Refer to the detailed sections for specific diagnostic steps and solutions to restore optimal performance.

Engine Won’t Start – Diagnosis

A non-starting engine requires systematic diagnosis. First, verify sufficient fuel and check the fuel shut-off valve. Inspect the spark plug for fouling or damage; a replacement may be necessary. Confirm the spark plug wire is securely connected. Ensure the safety interlock switches are fully engaged – these prevent starting if not properly activated.

If these checks don’t resolve the issue, examine the recoil starter mechanism for damage. A compression test can reveal internal engine problems. Consult a qualified technician if needed.

Auger Not Engaging – Solutions

If the auger fails to engage, initial checks are crucial. Verify the auger drive belt is intact and properly tensioned; a broken or slipped belt is a common cause. Inspect the shear pins – these are designed to break under excessive load, protecting the gearbox. Replace any broken shear pins with the correct type.

Examine the auger engagement cable for proper adjustment and functionality. Ensure no obstructions are preventing auger rotation. If issues persist, a gearbox inspection by a qualified technician is recommended.

Drive System Problems – Fixes

Addressing drive system issues starts with belt inspection. Check the drive belt for wear, damage, or slippage; replace if necessary. Verify proper belt tension – too loose or too tight can cause problems. Examine the drive clutch for engagement; a faulty clutch won’t transmit power.

Inspect the shear keys on the drive axle for damage. Confirm the drive control lever is functioning correctly and fully engaging. If self-propelled function is lost, a gearbox issue may require professional attention.

Belt Replacement Guide

Replacing the drive belt requires disconnecting the spark plug for safety. Begin by removing the auger housing and belt guards to access the belt. Note the belt routing before removal – diagrams are helpful! Carefully remove the old belt, ensuring no debris remains.

Install the new belt, following the original routing precisely. Verify proper alignment within the pulleys. Reinstall the belt guards and auger housing securely. Finally, reconnect the spark plug and test the drive system to confirm correct operation.

Scraper Bar Adjustment and Replacement

Maintaining the scraper bar ensures clean snow removal. Periodically check for wear and adjust its position for optimal contact with the surface. Loosen the adjustment bolts and lower the scraper bar until it lightly touches the ground when the auger is engaged.

For replacement, remove the auger housing bolts and carefully lift the housing. Detach the worn scraper bar and install the new one, securing it with the appropriate fasteners. Reassemble the auger housing and verify proper scraper bar function before operation.

Chute Cleaning and Maintenance

Regularly clear the snow chute to prevent clogging and maintain throwing performance. Always shut off the engine and disconnect the spark plug wire before attempting any chute cleaning. Use a sturdy, non-metallic tool to dislodge accumulated snow and ice.

Inspect the chute for damage and wear. Lubricate the chute rotation mechanism with a silicone-based lubricant to ensure smooth operation. Avoid using abrasive cleaners that could damage the chute’s finish. A clean chute maximizes throwing distance and prevents strain on the engine.

Storage and Winterization

Proper storage is crucial for extending the life of your Toro 521 snowblower. Before long-term storage, stabilize the fuel with a fuel stabilizer to prevent degradation and carburetor issues. Alternatively, drain the fuel tank completely. Disconnect the spark plug wire for safety.

Cover the snowblower with a waterproof cover to protect it from the elements. Store it in a dry, sheltered location. Inspect belts and shear pins before storage, replacing if necessary. A well-prepared snowblower ensures easy starting next winter.

Fuel Stabilization and Drain Procedures

To winterize your Toro 521, fuel stabilization is recommended. Add a fuel stabilizer to a full tank of fresh gasoline, then run the engine for approximately five minutes to circulate the treated fuel throughout the system. This prevents fuel breakdown and varnish formation during storage.

Alternatively, completely drain the fuel tank. Use a siphon or carefully tilt the snowblower. Dispose of the fuel responsibly. After draining, run the engine until it stalls to remove remaining fuel from the carburetor.

Snowblower Cover and Protection

Protecting your Toro 521 from the elements extends its lifespan. A properly fitted snowblower cover shields against moisture, dust, and UV rays during storage. Ensure the cover is breathable to prevent condensation buildup, which can lead to corrosion.

When storing outdoors, elevate the snowblower slightly off the ground to improve airflow. Regularly inspect the cover for tears or damage. Consider storing the snowblower indoors, in a dry shed or garage, for optimal protection against harsh weather conditions and potential animal interference.

Understanding the Toro 521’s Warranty

The Toro 521 snowblower warranty provides coverage against defects in materials and workmanship. Typically, a standard warranty covers the machine for a specified period from the original purchase date. This often includes parts and labor, but may vary based on the model and region.

Review your warranty documentation carefully to understand the specific terms, conditions, and exclusions. Proper maintenance, as outlined in this manual, is crucial for warranty validity. Keep your purchase receipt as proof of date and location of purchase for any warranty claims.

Locating Replacement Parts

Genuine Toro replacement parts are essential for maintaining the performance and longevity of your 521 snowblower. These parts ensure compatibility and uphold the quality standards of the original equipment.

You can locate replacement parts through several avenues: authorized Toro dealers, Toro’s online parts catalog (typically found on their official website), and select online retailers specializing in outdoor power equipment parts. When ordering, have your snowblower’s model and serial number readily available to ensure you receive the correct components.

Toro Customer Support Contact Information

For assistance with your Toro 521 snowblower, Toro offers multiple support channels. You can reach their customer support team via phone, typically available during standard business hours, for immediate assistance with questions or concerns.

Alternatively, Toro’s website provides a comprehensive support section, including FAQs, troubleshooting guides, and downloadable manuals. Email support is also often available for less urgent inquiries. Locate specific contact details – phone numbers, email addresses, and mailing addresses – on the official Toro website under their “Contact Us” or “Support” section.

Electrical System Overview

The Toro 521 snowblower’s electrical system powers the engine’s ignition and, potentially, headlight functionality. It comprises a battery, wiring harness, ignition switch, and fuses, all working in concert to initiate and sustain engine operation. Understanding this system is crucial for diagnosing starting issues or electrical malfunctions.

A detailed wiring diagram, typically found within the service manual, illustrates the connections between these components. Regular inspection of the wiring for damage and proper fuse operation is vital for safe and reliable performance. Always disconnect the spark plug before working on the electrical system.

Wiring Diagram Explanation

The Toro 521’s wiring diagram is a schematic representation of the electrical circuit, illustrating component connections and pathways. Symbols denote specific parts – batteries, switches, fuses, and the ignition coil. Tracing wires on the diagram corresponds to physical wires within the snowblower. Color-coding assists in identification.

Understanding the diagram allows for pinpointing shorts, open circuits, or faulty components. It’s essential for troubleshooting starting problems or electrical failures. Always refer to the diagram alongside physical inspection, and ensure the engine is off before any electrical work is undertaken for safety.

Fuse Replacement Procedures

Before replacing a fuse on your Toro 521, disconnect the spark plug wire to prevent accidental starting; Locate the fuse box, typically near the electrical components. Identify the blown fuse – it will have a broken filament or a darkened glass window.

Use a fuse puller (or insulated pliers) to remove the old fuse. Replace it with a new fuse of the exact same amperage rating. Never use a higher amperage fuse, as this can cause damage. Reconnect the spark plug wire and test the system. Repeated fuse failures indicate a larger electrical issue needing diagnosis.

Frequently Asked Questions (FAQ)

Q: Why won’t my Toro 521 start? A: Check fuel levels, spark plug condition, and ensure the shear pins are intact.

Q: How often should I change the oil? A: Refer to the maintenance schedule – typically every 50 hours or annually.

Q: What does it mean if the auger isn’t engaging? A: Inspect the shear pins and drive belt for damage.

Q: Where can I find replacement parts? A: Toro’s website or authorized dealers are the best sources. Contact Toro customer support for assistance.

char broil big easy instructions manual

Char vs. Char: A Deep Dive

Char and char‚ while seemingly similar‚ differ in how they interact with memory; both generate data‚ but one assigns to a pointer variable.

Essentially‚ char represents a pointer to a character‚ while char can be a pointer to a pointer‚ especially when dealing with arrays.

Arrays in C and C++ are often treated as pointer types‚ leading to automatic conversions when a char array is used where a char is expected.

Understanding the Fundamental Difference

Char and char diverge in their core nature despite often appearing interchangeable. Char fundamentally represents a single character value directly stored within a variable. Conversely‚ char typically functions as a pointer – a variable holding the memory address of a character or the beginning of a character sequence.

This distinction is crucial because it impacts how data is accessed and manipulated. When you work with char‚ you’re dealing with the character itself. With char‚ you’re working with a reference to where the character resides in memory. This pointer-based approach is essential when handling strings or larger blocks of character data.

The concept of “array decay” further complicates this; a char array effectively becomes a char pointer when used in certain contexts‚ highlighting the close relationship and potential for implicit conversions between these two types.

Char as a Single Character

When declared simply as char‚ a variable is designed to hold a single character. This character can be a letter‚ a number‚ a symbol‚ or any other representable character within the system’s character set. The char data type allocates enough memory – typically one byte – to store the ASCII value (or another encoding’s equivalent) of that single character.

Directly assigning a character literal (enclosed in single quotes‚ like ‘A’ or ‘7’) to a char variable stores that character’s corresponding numerical representation. Operations performed on a char variable often involve manipulating this numerical value‚ such as incrementing it to move to the next character in a sequence.

It’s important to remember that char‚ in this context‚ isn’t concerned with sequences or addresses; it’s solely focused on the individual character it holds.

Char as a Pointer to a Character

Declaring a variable as char signifies it holds the address of a character in memory‚ not the character itself. This means char stores the memory location where a character is stored. It’s a pointer‚ pointing to a char data type. This is crucial when working with strings or dynamically allocated memory.

When a char is assigned a value‚ it’s actually receiving the memory address of the first character in a sequence. This is why arrays and char often appear interchangeable – arrays “decay” into pointers to their first element. Operations on a char in this context involve manipulating memory addresses‚ like incrementing to point to the next character.

Understanding this distinction is vital for functions that modify strings or allocate memory for character data.

Memory Management and Char

Char memory allocation involves understanding pointers and dynamic allocation with functions like malloc‚ requiring careful handling to avoid memory leaks and ensure data integrity.

How Char Allocates Memory

When working with char‚ memory allocation depends on how it’s declared. A simple char variable directly stores a single character’s value within its assigned memory space. However‚ when dealing with sequences of characters – strings – memory allocation becomes more nuanced.

For instance‚ using malloc(5) allocates a contiguous block of memory capable of holding five chars. The variable‚ in this case‚ doesn’t store the characters themselves‚ but rather a pointer to the beginning of this allocated memory block. This pointer‚ of type char‚ then allows access and manipulation of the characters stored within that block.

It’s crucial to remember that char arrays‚ even though they appear to store characters directly‚ are fundamentally treated as pointers to the first element of the array. This means the array’s name effectively decays into a char pointer‚ representing the memory address where the character sequence begins.

Char and Dynamic Memory Allocation (malloc)

malloc plays a vital role when working with char to create strings of variable length. Unlike statically allocated arrays‚ malloc allows you to request memory during runtime‚ adapting to the specific needs of your program. For example‚ char s = malloc(5); allocates space for five characters.

However‚ malloc only provides a raw block of memory; it doesn’t automatically null-terminate it‚ which is essential for C-style strings. Therefore‚ you must explicitly add the null terminator (‘’) to signify the end of the string. Furthermore‚ when the allocated memory is no longer needed‚ it’s crucial to release it using free(s); to prevent memory leaks.

Dynamic allocation with malloc‚ combined with char pointers‚ provides flexibility in handling strings‚ allowing you to resize or modify them as required throughout the program’s execution. This is particularly useful when the string length is unknown at compile time.

The Role of Pointers in Char Usage

Pointers are fundamental to understanding char manipulation in C and C++. A char variable holds a single character‚ but a char pointer stores the address of a character in memory. This distinction is crucial when working with strings‚ which are essentially arrays of characters.

When you assign a char array to a char pointer‚ you’re not copying the array’s contents; instead‚ the pointer holds the address of the array’s first element. This is known as “array decay.” Consequently‚ modifications made through the pointer directly affect the original array.

Pointers enable efficient string processing‚ allowing you to traverse and manipulate characters without copying large blocks of data. They are also essential for passing strings to functions‚ as functions receive a pointer to the string’s beginning‚ not a copy of the entire string.

Arrays and Char

Char arrays store sequences of characters‚ while char can point to these arrays; arrays “decay” into pointers‚ becoming a pointer to the first element.

Char as an Array of Characters

When utilizing char to represent an array of characters‚ you’re essentially creating a contiguous block of memory designed to hold a sequence of individual characters. Each element within this array is a single char‚ capable of storing a letter‚ number‚ symbol‚ or control character. This arrangement is fundamental for representing strings in C and C++.

Crucially‚ a char array must be explicitly sized during declaration‚ defining the maximum number of characters it can accommodate. A null terminator (‘’) is conventionally used to mark the end of a string stored within a char array‚ enabling functions to determine the string’s length. Without this terminator‚ functions might read beyond the allocated memory‚ leading to undefined behavior.

For example‚ char myString[6] = “hello”; allocates space for ‚ storing ‘h’‚ ‘e’‚ ‘l’‚ ‘l’‚ ‘o’‚ and ‘’. This representation allows for efficient manipulation and processing of textual data.

Array Decay to Pointers

A core concept in C and C++ is “array decay‚” where a char array automatically converts to a pointer to its first element when used in many contexts. This means that when you pass a char array to a function‚ you’re actually passing a char pointer‚ not a copy of the entire array. This behavior is crucial for understanding how strings are handled.

This decay happens when the array is used in expressions‚ function arguments‚ or assignments where a pointer is expected. The compiler implicitly performs this conversion‚ treating the array name as a pointer to the initial element. However‚ the array’s size information is lost during this decay‚ which is why you often need to pass the size separately.

For instance‚ if a function expects a char pointer‚ providing a char array will work seamlessly due to this decay‚ but the function won’t inherently know the array’s bounds.

Char as an Array of Strings

A char can effectively store an array of strings‚ essentially creating an array of arrays of characters. In C and C++‚ this is often represented as a char pointer to an array of char pointers. Each char pointer within the outer array points to the beginning of a null-terminated string.

This structure allows you to manage multiple strings collectively. For example‚ you could have an array where each element is a string representing a different instruction or piece of data. The compiler interprets this as an array of strings‚ even though it’s fundamentally built using pointers.

However‚ managing memory for such an arrangement requires careful allocation and deallocation to prevent memory leaks. Each string within the array needs its own allocated memory‚ and all pointers must be handled correctly.

Printing Char and Char

When printing‚ use %c for single characters with char‚ and %s for entire strings when using char‚ which is a pointer-to-char.

Using the Correct Format Specifier (%c vs. %s)

Employing the correct format specifier within functions like printf is crucial for accurate output when working with char and char. A common error involves using the string specifier %s with a char data type‚ which is incorrect.

For printing a single character represented by a char variable‚ the appropriate specifier is %c. The corresponding argument passed to printf should then be a character variable (e.g.‚ char b). Conversely‚ when intending to print an entire string‚ the %s specifier must be used‚ and the argument should be a pointer-to-char (char)‚ effectively pointing to the beginning of the string in memory.

Misusing these specifiers can lead to undefined behavior‚ crashes‚ or incorrect output. Understanding this distinction is fundamental for reliable character and string manipulation in C and C++.

Printing Single Characters with Char

When your intention is to display a solitary character stored within a char variable‚ utilizing the %c format specifier in conjunction with functions like printf is paramount. The char data type is specifically designed to hold a single character value‚ and %c instructs the output function to interpret the corresponding argument as such.

For instance‚ if you have a char variable named b containing a character‚ the correct way to print it would be printf("%c"‚ b);. This ensures that the character’s numerical representation is translated into its corresponding glyph for display.

Attempting to use %s for a single char will lead to incorrect and unpredictable results‚ as %s expects a pointer to a null-terminated string‚ not a single character.

Printing Strings with Char

To effectively display a sequence of characters – a string – represented by a char pointer‚ the %s format specifier within functions like printf is essential. This specifier signals the function to interpret the provided argument as a pointer to a null-terminated character array‚ which defines the string.

Crucially‚ the argument passed alongside %s must be a char pointer (char *). This pointer points to the beginning of the character array in memory. For example‚ if test is a char pointer holding a string‚ you would use printf("%s"‚ test);.

Using %c with a string pointer will only print the first character‚ as it expects a single character‚ not a string address. Correct format specifier usage is vital for accurate output.

Modifying Char Data

Char arrays can be resized using realloc‚ and passed to functions using the ampersand (&) for address manipulation. Remember to free allocated memory.

Reallocating Memory for Char Arrays

When working with char arrays‚ you might need to adjust their size during program execution. This is where realloc comes into play. Initially‚ memory might be allocated using malloc‚ creating a char pointer to an array of a specific size.

However‚ if the data to be stored exceeds this initial allocation‚ realloc can be used to request a larger block of memory. It attempts to resize the existing block; if successful‚ it returns a pointer to the resized memory. If it fails‚ the original block remains unchanged‚ and realloc returns NULL.

It’s crucial to assign the result of realloc back to the original char pointer. Always check if realloc returns NULL to handle potential memory allocation failures gracefully. Failing to do so can lead to crashes or undefined behavior. Remember that realloc might move the data to a new location in memory.

Passing Char to Functions (ampersand &)

When passing char arrays to functions‚ understanding pass-by-value versus pass-by-reference is vital. Arrays inherently “decay” into pointers to their first element when passed to functions. This means the function receives a char pointer‚ not a copy of the entire array.

To modify the original array within the function‚ you don’t need to explicitly use the ampersand (&) operator. The function operates directly on the memory location of the original array. However‚ if you want to reallocate the memory pointed to by the char pointer within the function‚ you must pass a pointer to the pointer (char**) using the ampersand.

This allows the function to modify the original pointer itself‚ updating where the array is located in memory. Without this‚ any changes to the pointer within the function would only affect a local copy.

Freeing Memory Allocated to Char

When dynamically allocating memory for char arrays using functions like malloc‚ it’s crucial to release that memory using free once it’s no longer needed. Failing to do so results in memory leaks‚ potentially leading to program instability or crashes.

If you’ve allocated memory for a char array and assigned its address to a char pointer‚ you simply pass that pointer to free. For example‚ if you have char s = malloc(5);‚ you would call free(s); to release the allocated memory.

If you’ve passed a pointer to a char pointer (char*) to a function that reallocated the memory‚ you must free the original pointer after the function returns. Proper memory management is essential for robust and efficient C programming.

Advanced Concepts

Char can become a pointer-to-pointer‚ and understanding the nuances between C and C++ handling of char data is vital for complex operations.

Char and Pointer-to-Pointer to Char

A char can evolve into a pointer-to-pointer‚ essentially a pointer holding the address of another pointer that points to a character. This arises when dealing with arrays of strings‚ where each string itself is a char array‚ and the array of strings is managed as a pointer to pointers.

Consider a scenario where you have an array of character pointers – each pointer points to the beginning of a string. The variable holding this array of pointers is‚ therefore‚ a pointer-to-pointer to char. This structure allows for dynamic manipulation of strings‚ enabling modifications to individual strings or the addition/removal of strings from the array.

Understanding this concept is crucial when working with functions that modify strings in place‚ as the function receives a pointer to a pointer‚ allowing it to alter the original string data directly. It’s a powerful‚ yet potentially complex‚ aspect of C and C++ string handling.

The Relationship Between C and C++ Char Handling

Both C and C++ define arrays as decaying into pointers‚ meaning a char array can often be used wherever a char is expected‚ as the compiler implicitly converts the array to a pointer to its first element. However‚ C++ introduces features like std::string‚ offering a safer and more convenient alternative to raw char arrays.

While C relies heavily on manual memory management with char and malloc‚ C++ encourages the use of smart pointers and the std::string class to automate memory handling and reduce the risk of memory leaks. Despite these differences‚ the fundamental char type remains consistent across both languages.

Understanding this shared foundation is vital when interacting with C libraries from C++ code‚ as you’ll often encounter char arrays and pointers. C++ provides mechanisms to seamlessly work with these C-style strings‚ but awareness of the underlying pointer arithmetic is essential.

dyson dc39 instruction manual

Dyson DC39 Instruction Manual: A Comprehensive Guide

This manual details the Dyson DC39’s operation‚ maintenance‚ and warranty. It covers assembly‚ features like Radial Root Cyclone technology‚ and troubleshooting for optimal cleaning performance;

Welcome to the world of powerful and efficient cleaning with your new Dyson DC39 vacuum cleaner! This machine represents a significant advancement in floor care technology‚ designed to capture even microscopic dust and allergens‚ ensuring a cleaner and healthier home environment. The DC39 isn’t just a vacuum; it’s an investment in a superior cleaning experience.

This instruction manual serves as your comprehensive guide to understanding and utilizing all the features of your Dyson DC39. Within these pages‚ you’ll find detailed instructions on assembly‚ operation‚ maintenance‚ and troubleshooting. Dyson prioritizes user experience‚ and this manual is crafted to empower you to maximize the performance and longevity of your appliance.

Your Dyson DC39 is covered by a 2-year warranty for parts and labor‚ demonstrating Dyson’s commitment to quality and customer satisfaction. Before operating your vacuum‚ please carefully review the safety guidelines and operating instructions provided within this manual to ensure safe and effective use.

Unboxing and Component Checklist

Carefully unpack your Dyson DC39 and verify that all components are present and undamaged. The box should contain the main body of the Dyson DC39 vacuum‚ the wand‚ the floor tool (typically a combination tool for various floor types)‚ and potentially additional tools depending on the model purchased.

Inspect each component for any signs of shipping damage. If any parts are missing or damaged‚ immediately contact Dyson Customer Care for assistance. Retain the original packaging for potential returns or warranty claims. Familiarize yourself with each part before proceeding with assembly.

A quick visual check should confirm the presence of the dust bin (already attached to the main body)‚ the hose connection point‚ and the power cable. Refer to the included diagrams for a clear illustration of each component. Proper inventory ensures a smooth setup process and optimal performance from your new Dyson DC39.

Assembly Instructions

Begin by ensuring the main body of the Dyson DC39 is placed on a stable surface. Assembly is straightforward‚ primarily involving connecting the wand and floor tool. First‚ attach the wand to the main body by aligning the connector and twisting until it clicks securely into place. Ensure a firm connection to prevent detachment during operation.

Next‚ connect the floor tool to the end of the wand‚ again aligning the connectors and twisting to lock it in position. Verify that both connections are robust and won’t loosen with movement. Always extend the power cable fully to the red tape before plugging it into a mains electricity supply.

Before use‚ carefully review the operating manual for detailed diagrams and safety precautions. Proper assembly is crucial for optimal suction and efficient cleaning performance; Incorrect assembly may compromise the vacuum’s effectiveness and potentially cause damage.

Connecting the Wand and Floor Tool

To connect the wand‚ align the wand connector with the corresponding port on the Dyson DC39’s main body. Push the wand firmly into the port and twist clockwise until you hear a distinct click‚ confirming a secure attachment. A loose connection can reduce suction power and create instability during use.

Subsequently‚ attach the floor tool to the wand’s end. Similar to the wand connection‚ align the tool’s connector with the wand’s port. Push and twist clockwise until a click indicates a secure lock. Regularly check these connections before each use to ensure they remain firmly fastened.

Ensure proper alignment before twisting to avoid damaging the connectors. If resistance is met‚ re-align and try again. A secure connection is vital for efficient dirt and debris removal across various floor types.

Attaching Additional Tools

The Dyson DC39’s versatility extends with its range of additional tools. These tools connect to either the wand directly or to the main body when the wand is detached‚ offering specialized cleaning solutions.

To attach a tool‚ identify the appropriate connector on the tool and align it with the corresponding port on the wand or main body. Push firmly and twist clockwise until a click confirms a secure fit. Ensure the tool is firmly locked before use to prevent accidental detachment during operation.

Different tools cater to specific cleaning needs‚ such as the combination tool for versatile surface cleaning and the crevice tool for reaching tight spaces. Regularly inspect the tools for any damage or blockages to maintain optimal performance. Proper attachment ensures maximum suction and cleaning efficiency.

Understanding the Dyson DC39 Features

The DC39 boasts Radial Root Cyclone technology and power control settings. It adapts to various floor types‚ efficiently capturing dust and allergens for powerful cleaning.

Radial Root Cyclone Technology Explained

Dyson’s Radial Root Cyclone technology is a core feature of the DC39‚ fundamentally changing how the vacuum cleaner separates dust and dirt. Unlike traditional vacuums that rely on a bag to trap particles‚ or lose suction as dust accumulates‚ the DC39 utilizes centrifugal forces to spin air and dust from the floor at incredibly high speeds – up to 150‚000 rpm.

This intense spinning action forces microscopic particles‚ including dust and allergens‚ outwards towards the outside of the cyclone. The dust and debris are then efficiently separated from the airflow and deposited directly into the dust bin‚ without clogging the filter. This innovative design maintains consistent suction power throughout the cleaning process‚ ensuring optimal performance even as the bin fills.

The “root” aspect refers to the arrangement of cyclones – positioned in a specific configuration to maximize airflow and separation efficiency. This technology captures even the smallest particles‚ improving air quality and providing a more thorough clean. It’s a key differentiator for Dyson vacuums‚ delivering powerful and consistent cleaning performance.

Power Control Settings

The Dyson DC39 offers adjustable power control settings‚ allowing you to tailor the suction to different floor types and cleaning tasks. These settings are crucial for maximizing cleaning efficiency and protecting delicate surfaces.

Typically‚ the DC39 features a variable power slider or buttons. Lower power settings are ideal for delicate surfaces like rugs‚ curtains‚ or upholstery‚ preventing damage and ensuring gentle cleaning. Higher power settings deliver maximum suction‚ perfect for deep cleaning carpets and hard floors with embedded dirt.

Adjusting the power level not only protects your floors but also optimizes energy consumption. Using lower power when appropriate extends runtime if using a cordless model (though the DC39 is corded). Experimenting with the settings allows you to find the perfect balance between cleaning power and surface protection‚ ensuring a thorough and safe cleaning experience.

Floor Type Adaptations

The Dyson DC39 excels at adapting to various floor types‚ thanks to its design and included tools. It effectively cleans carpets‚ hardwood‚ tile‚ and other surfaces‚ delivering consistent suction power. Utilizing the correct settings and tools is key to optimal performance.

For carpets‚ the DC39’s powerful suction and brush bar agitate fibers‚ lifting embedded dirt and debris. On hard floors‚ adjusting the power setting prevents scattering and protects the surface. The included combination tool is versatile‚ switching between a brush for gentle dusting and a crevice tool for reaching tight spaces.

Proper adaptation ensures efficient cleaning and prevents damage. Regularly switching between settings and tools based on the floor type maximizes the DC39’s effectiveness. This adaptability makes it a suitable cleaning solution for homes with mixed flooring surfaces‚ providing a consistently clean environment.

Operating the Dyson DC39

To begin‚ fully extend the power cord to the red marker. Press the red power button to switch the DC39 on or off for convenient cleaning.

Powering On and Off

Operating your Dyson DC39 is straightforward‚ beginning with the power function. Before use‚ ensure the machine is properly assembled with the wand and floor tool securely connected; To initiate cleaning‚ locate the red power button on the main body of the vacuum. A single press activates the suction‚ indicated by the motor starting.

The DC39 doesn’t feature a traditional ‘on/off’ switch; it utilizes a momentary button. This means you must continuously press the button to maintain operation. Releasing the button immediately stops the motor and suction. This design prevents accidental continuous running and conserves energy.

Always ensure the dust bin is correctly installed before powering on to prevent any loss of suction. If the machine fails to start‚ check the power cord connection and ensure it’s fully extended to the red tape. A flashing light may indicate a blockage‚ requiring immediate attention. Remember to carry the appliance by the main handle during operation.

Using the Wand Extension

The Dyson DC39’s wand extension significantly expands its reach‚ allowing for versatile cleaning above-floor surfaces. To utilize the wand‚ first ensure the machine is switched off. Detach the floor tool from the main body‚ then firmly connect the wand to the vacuum’s cyclone assembly – a distinct ‘click’ confirms secure attachment.

Next‚ attach your desired tool (combination or crevice) to the wand’s end‚ again listening for the click. The wand’s lightweight design and swivel action facilitate easy maneuvering around furniture and tight spaces. Extend the wand fully for maximum reach‚ but maintain a firm grip for control.

When cleaning upwards‚ be mindful of the machine’s weight distribution. The wand’s flexibility allows access to curtains‚ upholstery‚ and ceilings. Remember to power on the DC39 while holding the wand securely‚ and release the power button to pause cleaning as needed.

Utilizing Different Floor Tools

The Dyson DC39 comes equipped with various floor tools designed for optimal cleaning on diverse surfaces. The primary floor tool is ideal for carpets and hard floors‚ automatically adjusting brush head height for effective dirt removal; For combined cleaning tasks‚ the combination tool excels – its brush effectively dusts surfaces while the nozzle vacuums debris.

The crevice tool is invaluable for reaching narrow spaces‚ such as along edges‚ between cushions‚ and in tight corners. Its focused suction power eliminates dust and dirt from these hard-to-reach areas. To switch tools‚ simply detach the current one by pressing the release button and attach the desired tool until it clicks into place.

Ensure a secure connection before operating the vacuum. Regularly inspect the tools for blockages and clean as needed to maintain peak performance. Proper tool selection maximizes the DC39’s cleaning efficiency.

The Combination Tool

The Dyson DC39’s combination tool is a versatile attachment designed for both dusting and direct vacuuming. It features a soft brush head ideal for gently cleaning delicate surfaces like furniture‚ lampshades‚ and window sills‚ preventing scratches or damage. Simultaneously‚ the tool’s nozzle allows for direct suction of dust and debris from these surfaces‚ providing a comprehensive cleaning solution.

To effectively use the combination tool‚ simply attach it to the wand or the main body of the Dyson DC39. Slide the tool onto the wand until it clicks securely into place. When dusting‚ use a sweeping motion with the brush‚ while the nozzle can be used to target specific areas of dirt or debris.

Regularly check the brush head for accumulated dust and hair‚ cleaning it as needed to maintain optimal performance. This tool’s dual functionality makes it a valuable asset for whole-home cleaning.

The Crevice Tool

The Dyson DC39’s crevice tool is specifically engineered for reaching tight‚ awkward spaces where dirt and debris commonly accumulate. This slender attachment excels at cleaning along edges‚ in corners‚ between cushions‚ and within narrow gaps that standard floor tools cannot access effectively. Its focused suction power ensures thorough removal of dust‚ crumbs‚ and allergens from these hard-to-reach areas.

To utilize the crevice tool‚ securely attach it to the wand or the main body of your Dyson DC39. Ensure a firm connection by sliding it onto the wand until it clicks. When cleaning‚ guide the tool’s narrow opening directly into the crevice or gap‚ applying gentle pressure to maximize suction.

This tool is particularly useful for cleaning car interiors‚ around baseboards‚ and along the edges of stairs. Regular use of the crevice tool contributes to a more comprehensive and hygienic clean throughout your home.

Maintenance and Troubleshooting

Regular maintenance ensures peak performance. This section covers emptying the dust bin‚ washing the filter‚ and identifying/resolving common blockages within your Dyson DC39.

Emptying the Dust Bin

Regularly emptying the dust bin is crucial for maintaining suction power. The Dyson DC39’s bin is designed for hygienic disposal of collected dirt and debris. To empty‚ detach the bin from the machine by pressing the release button – typically located on the top or side‚ depending on the specific model variation.

Hold the bin over a suitable waste container. Press the bin emptying lever (usually a red button or trigger) to release the contents. Ensure all debris falls completely from the bin. For stubborn dust‚ gently tap the bin’s sides while emptying.

After emptying‚ reattach the bin securely to the machine‚ ensuring it clicks firmly into place. A properly sealed bin is essential for effective filtration and optimal cleaning performance. Avoid overfilling the bin‚ as this can reduce suction and potentially damage the machine. Empty frequently during use‚ especially when vacuuming large amounts of dust or debris.

Washing the Filter

Maintaining a clean filter is vital for consistent suction and air quality. The Dyson DC39 filter requires periodic washing to remove accumulated dust and allergens. Detach the filter – consult your specific model’s documentation for its location‚ often found within the dust bin assembly.

Rinse the filter under cold water until the water runs clear. Do not use detergents or cleaning agents‚ as these can damage the filter material. Gently squeeze out excess water‚ but avoid twisting or wringing‚ which can also cause damage.

Allow the filter to air dry completely – this typically takes 24-48 hours – before reinstalling it into the machine. Never reassemble the Dyson with a damp filter‚ as this can lead to mold growth and damage the motor. Regularly washing the filter (every few months‚ depending on usage) ensures optimal performance and prolongs the life of your Dyson DC39.

Checking for Blockages

Reduced suction power often indicates a blockage within your Dyson DC39. Regularly inspect the wand‚ hose‚ floor tool‚ and dust bin for obstructions. Begin by disconnecting the wand and hose from the main body; Visually examine these components for visible debris.

Use a long‚ sturdy object (like a broom handle – carefully!) to gently dislodge any blockages within the wand or hose. Check the floor tool for tangled hair‚ string‚ or larger particles. Ensure the dust bin is emptied and free of compacted dirt.

Pay close attention to the inlet points of each component where debris commonly accumulates. If a blockage persists‚ consult the manual for specific disassembly instructions to access and clear more difficult-to-reach areas. Addressing blockages promptly restores optimal suction and cleaning performance.

Identifying Common Blockage Locations

Several areas within the Dyson DC39 are prone to blockages. The wand is a frequent culprit‚ especially with larger debris or when vacuuming upholstery. Check the hose connections – bends and curves often trap materials. The floor tool‚ particularly the brush bar‚ accumulates hair and fibers.

Inspect the cyclone assembly; while designed to separate dust‚ it can occasionally become congested. The inlet to the dust bin itself is another common blockage point. Regularly examine these locations during routine maintenance.

Focus on areas where the airflow changes direction or narrows. Tangled hair‚ string‚ and plastic wrappers are typical offenders. Early detection and removal of these obstructions prevent reduced suction and maintain peak performance. Consistent checks in these key areas will prolong the life of your Dyson DC39.

Dyson DC39 Warranty Information

Dyson provides a comprehensive warranty for the DC39 vacuum cleaner‚ covering parts and labor for a period of two years from the date of purchase. This guarantee ensures protection against defects in materials and workmanship under normal household use.

The warranty encompasses the motor‚ cyclone assembly‚ and other mechanical components. However‚ it does not cover damage resulting from misuse‚ accidental damage‚ or unauthorized repairs. Proof of purchase is essential to validate any warranty claim.

To initiate a warranty claim‚ contact Dyson Customer Care. They will guide you through the process‚ which may involve troubleshooting or arranging for repair or replacement. Refer to the complete terms and conditions detailed within the Dyson Operating Manual for full coverage specifics and exclusions.

2019 chevy traverse maintenance schedule pdf

Maintaining your 2019 Chevy Traverse is crucial for longevity and performance; a detailed PDF schedule outlines essential services‚ ensuring optimal vehicle health and reliability.

Importance of Following the Schedule

Adhering to the 2019 Chevy Traverse maintenance schedule‚ often found as a PDF document‚ isn’t merely a suggestion—it’s a proactive investment in your vehicle’s lifespan and resale value. Regular maintenance prevents minor issues from escalating into costly repairs‚ ensuring dependable transportation. Following the schedule guarantees optimal engine performance‚ efficient fuel economy‚ and the continued functionality of vital systems like brakes and steering.

Neglecting scheduled services can void portions of your vehicle’s warranty‚ leaving you financially responsible for unexpected breakdowns. A well-maintained Traverse also contributes to enhanced safety for you‚ your passengers‚ and others on the road. The PDF provides a clear roadmap for preventative care‚ allowing you to anticipate and address potential problems before they impact your driving experience. Prioritize your Traverse’s health – stick to the schedule!

Where to Find the Official PDF

Locating the official 2019 Chevy Traverse maintenance schedule PDF is straightforward. The primary source is the Chevy Owner Center website (www.my.chevrolet.com)‚ where you can input your Vehicle Identification Number (VIN) for a personalized schedule. Alternatively‚ many Chevy dealerships can provide a physical copy or email the PDF directly.

Online forums and Chevy enthusiast communities often host downloadable versions‚ but always verify the document’s authenticity against the official Chevy source to ensure accuracy. Be cautious of third-party websites offering the schedule‚ as information may be outdated or incorrect. Downloading directly from the Chevy Owner Center guarantees you have the most current and reliable maintenance guidelines for your specific 2019 Traverse model. Prioritize official sources for peace of mind!

Understanding the Maintenance Intervals

The 2019 Traverse schedule utilizes mileage and time-based intervals‚ typically 7‚500 miles/6 months‚ 15‚000 miles/12 months‚ and longer durations for major services.

Every 7‚500 Miles or 6 Months

At this interval‚ prioritizing an oil and filter change is paramount for engine health‚ maintaining lubrication and removing contaminants. Simultaneously‚ a tire rotation ensures even wear‚ extending tire life and optimizing handling. Inspecting vital fluids like windshield washer fluid is also recommended. Checking tire pressure is crucial for safety and fuel efficiency. A visual inspection of lights – headlights‚ brake lights‚ and turn signals – should be performed to guarantee proper functionality. Don’t forget to examine the wiper blades for wear and tear‚ replacing them if necessary to maintain clear visibility during inclement weather. This routine maintenance contributes significantly to the overall reliability and longevity of your 2019 Chevy Traverse‚ preventing potential issues down the road.

Oil and Filter Change

Regular oil changes are the lifeblood of your 2019 Chevy Traverse’s engine‚ crucial for reducing friction‚ dissipating heat‚ and removing debris. Utilizing the correct oil type – as specified in your owner’s manual – is paramount. The oil filter‚ equally important‚ traps contaminants‚ preventing them from circulating and causing damage. Ignoring this service can lead to increased engine wear‚ reduced fuel efficiency‚ and potentially catastrophic failure. A quality oil and filter change typically involves draining the old oil‚ replacing the filter‚ and refilling with fresh oil to the recommended level. Consistent adherence to this maintenance item‚ typically every 7‚500 miles or six months‚ safeguards your engine’s performance and extends its lifespan considerably.

Tire Rotation

Consistent tire rotation is a simple yet vital maintenance practice for your 2019 Chevy Traverse‚ promoting even tire wear and maximizing their lifespan. Uneven wear patterns can develop due to factors like driving habits‚ vehicle load‚ and front versus rear axle weight distribution. Rotating tires – typically following a specific pattern outlined in your owner’s manual – ensures all tires contribute equally to handling and braking performance. This practice also helps maintain optimal fuel efficiency and reduces road noise. The recommended interval for tire rotation is generally every 7‚500 miles or six months‚ coinciding with oil changes for convenience. Neglecting tire rotation can lead to premature tire failure and compromised safety.

Every 15‚000 Miles or 12 Months

At the 15‚000-mile or 12-month mark for your 2019 Chevy Traverse‚ a more comprehensive inspection is recommended. This includes a thorough examination of the brake system – pads‚ rotors‚ lines‚ and fluid levels – to ensure optimal stopping power and safety. Simultaneously‚ all essential vehicle fluids‚ such as coolant‚ brake fluid‚ power steering fluid‚ and windshield washer fluid‚ should be checked and topped off as needed. A crucial replacement at this interval is the cabin air filter‚ which significantly impacts the air quality inside the vehicle‚ removing dust‚ pollen‚ and other contaminants. Addressing these items proactively contributes to a comfortable and reliable driving experience.

Inspect Brake System

A detailed brake system inspection is paramount for safety‚ occurring at 15‚000 miles or annually. Technicians will meticulously examine brake pads for wear‚ ensuring sufficient friction material remains for effective stopping. Rotors are assessed for scoring‚ warping‚ or excessive rust‚ potentially requiring resurfacing or replacement. Brake lines and hoses are scrutinized for leaks‚ cracks‚ or damage‚ vital for maintaining hydraulic pressure. Finally‚ the brake fluid level and condition are checked; contaminated or low fluid compromises braking performance. Addressing any identified issues promptly guarantees reliable and responsive braking‚ protecting you and your passengers.

Check and Top Off Fluids (Coolant‚ Brake‚ Power Steering‚ Washer)

Regular fluid level checks are essential for optimal 2019 Traverse operation‚ performed every 15‚000 miles or annually. Coolant levels are verified to prevent overheating and maintain engine temperature regulation. Brake fluid is inspected for proper levels and contamination‚ ensuring responsive braking performance. Power steering fluid is checked to guarantee smooth steering operation and prevent pump damage. Lastly‚ windshield washer fluid is topped off for clear visibility. Technicians also assess fluid conditions‚ noting any discoloration or unusual smells indicating potential leaks or system issues. Maintaining correct fluid levels safeguards vital components and ensures reliable vehicle function.

Cabin Air Filter Replacement

Replacing the cabin air filter on your 2019 Chevy Traverse every 15‚000 miles or annually is vital for maintaining excellent air quality inside the vehicle. This filter traps dust‚ pollen‚ and other airborne particles‚ preventing them from entering the cabin and circulating through the ventilation system. A clogged filter reduces airflow‚ impacting heating and cooling efficiency. Replacement ensures optimal HVAC performance and a healthier environment for passengers‚ especially those with allergies or respiratory sensitivities. Technicians will inspect the old filter’s condition and install a new one‚ contributing to a more comfortable and breathable interior space for all occupants.

Every 30‚000 Miles or 24 Months

At the 30‚000-mile or 24-month mark for your 2019 Chevy Traverse‚ several key inspections and replacements are recommended. This interval focuses on components impacting long-term reliability. Technicians will thoroughly inspect the suspension system‚ checking for wear and tear on shocks‚ struts‚ and related parts‚ ensuring a smooth and controlled ride. The engine air filter is also replaced‚ maximizing engine efficiency and performance. Additionally‚ a comprehensive inspection of the exhaust system is performed to identify any leaks or damage. These preventative measures help maintain optimal vehicle function and prevent potential costly repairs down the road.

Engine Air Filter Replacement

Replacing the engine air filter on your 2019 Chevy Traverse every 30‚000 miles‚ or 24 months‚ is a vital maintenance step. A clean air filter ensures optimal engine performance by providing a consistent flow of clean air for combustion. A clogged filter restricts airflow‚ reducing engine efficiency and potentially causing damage over time. This simple‚ yet crucial‚ replacement improves fuel economy and protects the engine from harmful contaminants like dust and debris. Regular replacement contributes to a longer engine lifespan and maintains the overall health of your vehicle’s powertrain. It’s a cost-effective way to prevent more significant issues.

Inspect Suspension Components

During the 30‚000-mile or 24-month service interval for your 2019 Chevy Traverse‚ a thorough inspection of the suspension components is essential. This includes checking the shocks‚ struts‚ ball joints‚ tie rod ends‚ and bushings for wear‚ damage‚ or leaks. A properly functioning suspension system ensures a comfortable ride‚ stable handling‚ and optimal tire contact with the road. Identifying and addressing any issues early on prevents more costly repairs down the line and maintains vehicle safety. Worn suspension parts can negatively impact steering responsiveness and braking performance‚ so regular inspection is paramount for safe operation.

Inspect Exhaust System

As part of the 30‚000-mile or 24-month maintenance for your 2019 Chevy Traverse‚ a detailed inspection of the exhaust system is vital. Technicians will examine the exhaust pipes‚ muffler‚ catalytic converter‚ and exhaust manifold for signs of rust‚ corrosion‚ leaks‚ or damage. A compromised exhaust system can lead to reduced fuel efficiency‚ increased emissions‚ and potentially dangerous carbon monoxide exposure within the vehicle. Early detection of issues‚ like cracks or loose connections‚ allows for timely repairs‚ preventing further deterioration and ensuring compliance with emissions regulations. A properly functioning exhaust system also contributes to quieter operation.

Every 60‚000 Miles or 48 Months

Reaching the 60‚000-mile or 48-month mark for your 2019 Chevy Traverse necessitates several key maintenance procedures. This interval includes a crucial transmission fluid change‚ ensuring smooth shifting and preventing internal damage. Spark plug replacement is also essential‚ restoring optimal engine performance and fuel efficiency. Furthermore‚ a coolant flush and replacement are required to maintain proper engine temperature regulation and prevent corrosion within the cooling system. These services are vital for preventing major mechanical issues and extending the lifespan of your Traverse. Adhering to this schedule‚ as outlined in the official maintenance PDF‚ guarantees continued reliability.

Transmission Fluid Change

For your 2019 Chevy Traverse‚ a transmission fluid change at the 60‚000-mile mark (or 48 months) is critically important. Old transmission fluid degrades‚ losing its lubricating properties and ability to effectively cool the transmission. This degradation can lead to rough shifting‚ decreased fuel efficiency‚ and ultimately‚ costly transmission repairs. The official maintenance PDF recommends a complete fluid flush and filter replacement. Using the correct type of fluid‚ specified in the owner’s manual and PDF‚ is paramount. Ignoring this service can significantly shorten the life of your transmission‚ resulting in expensive replacements. Regular fluid changes ensure smooth operation and long-term reliability.

Spark Plug Replacement

The 2019 Chevy Traverse’s spark plugs should be replaced at the 60‚000-mile (or 48-month) interval‚ as detailed in the official maintenance PDF. Worn spark plugs cause misfires‚ reducing engine performance‚ fuel economy‚ and potentially damaging the catalytic converter. Replacing them restores optimal combustion‚ ensuring smooth acceleration and efficient operation. The PDF specifies the correct spark plug type for your engine; using the wrong plugs can lead to performance issues. This service often involves removing ignition coils and carefully installing the new plugs to the manufacturer’s torque specifications. Regular spark plug replacement is a preventative measure that contributes to long-term engine health and reliability.

Coolant Flush and Replacement

According to the 2019 Chevy Traverse maintenance PDF‚ a complete coolant flush and replacement is recommended every 60‚000 miles or 48 months. Over time‚ coolant degrades‚ losing its ability to effectively regulate engine temperature and protect against corrosion. Old coolant can become acidic‚ damaging radiator hoses‚ water pumps‚ and even the engine block itself; A flush removes the old coolant and replaces it with fresh‚ properly formulated fluid. The PDF specifies the correct coolant type for your Traverse; using the wrong type can cause damage. This service ensures optimal engine cooling‚ preventing overheating and extending the life of your cooling system components.

Every 100‚000 Miles

The 2019 Chevy Traverse maintenance PDF details significant services due at the 100‚000-mile mark. This includes a crucial inspection and potential replacement of the accessory drive belt‚ responsible for powering components like the alternator and power steering pump. A failing belt can lead to unexpected breakdowns. Furthermore‚ the water pump should be thoroughly inspected for leaks or signs of wear; replacement is often recommended proactively to prevent coolant loss and engine overheating. These preventative measures‚ outlined in the PDF‚ are vital for maintaining the long-term reliability of your Traverse‚ avoiding costly repairs down the road‚ and ensuring continued safe operation.

Accessory Drive Belt Replacement

The 2019 Chevy Traverse maintenance PDF recommends replacing the accessory drive belt at 100‚000 miles. This belt is critical‚ powering essential components like the alternator‚ power steering pump‚ and air conditioning compressor. A worn or cracked belt can cause these systems to malfunction‚ leading to issues like a dead battery‚ difficult steering‚ or loss of cooling. Replacement involves removing the old belt and installing a new one‚ ensuring proper tension for optimal performance. The PDF provides specific instructions and torque specifications. Ignoring this maintenance item can result in unexpected breakdowns and potentially more expensive repairs‚ so adhering to the schedule is highly recommended for continued vehicle reliability.

Water Pump Inspection/Replacement

According to the 2019 Chevy Traverse maintenance PDF‚ a water pump inspection is advised at 100‚000 miles‚ with replacement considered based on condition. The water pump circulates coolant throughout the engine‚ preventing overheating. Signs of failure include coolant leaks‚ unusual noises‚ or engine temperature fluctuations. Replacement is a more involved process‚ often performed alongside the timing belt (if applicable) due to its location. The PDF details the necessary steps‚ including coolant draining and proper torque specifications for reinstallation. A failing water pump can cause severe engine damage‚ so proactive inspection and timely replacement‚ as outlined in the schedule‚ are vital for preventing costly repairs and maintaining engine health.

Specific 2019 Chevy Traverse Maintenance Items

The 2019 Traverse PDF highlights unique maintenance needs‚ including all-wheel drive system checks and battery assessments‚ ensuring optimal functionality and longevity.

All-Wheel Drive System Maintenance

For 2019 Chevy Traverse models equipped with all-wheel drive (AWD)‚ the maintenance schedule‚ detailed in the official PDF‚ emphasizes regular inspections. Specifically‚ at 30‚000 miles‚ a thorough inspection of the AWD system is recommended to check for any leaks‚ damage‚ or unusual wear. This includes examining the transfer case fluid level and condition‚ as well as inspecting the driveshafts and axles for proper operation.

Furthermore‚ the PDF suggests considering a fluid change for the transfer case at 60‚000 miles‚ or sooner if operating in severe conditions like frequent towing or off-road driving. Maintaining the AWD system is vital for ensuring consistent traction and optimal performance‚ especially during inclement weather. Ignoring these maintenance intervals could lead to costly repairs and diminished vehicle capability.

Battery Inspection and Replacement

The 2019 Chevy Traverse maintenance schedule‚ as outlined in the official PDF‚ highlights the importance of regular battery inspections. These inspections should occur at least annually‚ or more frequently if you notice any starting issues. The PDF recommends visually checking the battery terminals for corrosion and ensuring they are securely connected.

Additionally‚ a battery test is advised to assess its overall health and charging capacity. Typically‚ a battery replacement is recommended around the 60‚000-mile mark‚ or sooner depending on climate and usage patterns. Extreme temperatures can significantly impact battery life. Proactive battery replacement prevents unexpected breakdowns and ensures reliable vehicle operation‚ especially during colder months when battery performance is most critical.

Resources for the 2019 Chevy Traverse

For comprehensive support‚ utilize the Chevy Owner Center and explore dedicated online forums; these platforms offer valuable insights and the official PDF.

Chevy Owner Center

The Chevrolet Owner Center is an invaluable resource for all 2019 Traverse owners‚ providing direct access to your vehicle’s specific maintenance needs. After registering your vehicle with a VIN‚ you can download the official 2019 Chevy Traverse maintenance schedule in PDF format. This document details every service interval‚ from routine oil changes and tire rotations to more complex procedures like transmission fluid replacements and spark plug changes.

Beyond the schedule‚ the Owner Center offers personalized service reminders‚ allowing you to stay on top of required maintenance. You can also find information on warranty coverage‚ recall notices‚ and access exclusive owner benefits. It’s a centralized hub for managing all aspects of your Traverse’s upkeep‚ ensuring it remains in peak condition for years to come. Utilizing this platform simplifies maintenance tracking and promotes proactive vehicle care.

Online Forums and Communities

Numerous online forums and Chevrolet Traverse communities offer a wealth of information regarding the 2019 model’s maintenance. While the official PDF schedule is paramount‚ these platforms provide real-world experiences from fellow owners. Discussions often cover common maintenance issues‚ recommended service intervals based on driving conditions‚ and even DIY repair guides.

These communities can be incredibly helpful for interpreting the maintenance schedule and understanding the nuances of Traverse upkeep. Owners frequently share their service costs‚ preferred mechanics‚ and tips for extending the vehicle’s lifespan. However‚ always verify information found on forums with the official Chevrolet documentation to ensure accuracy. They are a great supplement‚ offering practical insights and a supportive network for Traverse owners seeking advice and shared knowledge.